
Square’s latest JRPG Octopath Traveler is fast approaching, and with the release of the Prologue demo during E3, now is the perfect time for you to get prepared for the full game. Since the new demo gives access to unlimited access to the all eight starting zones for the game’s roster, there’s plenty you can do within the allotted three hour time limit you’re given. What’s more, once your three hours are up, you can keep the save file and transfer it over to the main game on launch day. With that in mind, there’s plenty you can get done to help you be fighting fit and ready to go, and to help you we’ve compiled a list of clever tricks and sneaky tips to help you on your way.
Before we begin, however, there are a few uncertainties you should be aware of before you start your save file. The most important being that as of right now, the hero you choose at the start is seemingly locked in and as you recruit more of the cast on your journey, you’ll find that your initial character cannot be swapped out of your party. This can play a key role when trying to build your perfect team, so while it might be tempting to grab one of the more useful utility heroes for their path action at the start, be aware that it is currently believed that they will take up a permanent slot in your party.
You should also be aware that some of the tricks mentioned below can easily cause difficult encounters to become fairly hassle-free, so be mindful of using them if you’re looking for a challenge. This is especially true for the Golden Axe, and the two max damage NPCs that can be allured. For the sake of clarity we’ve highlighted anything currently considered potentially game-breaking and overly powerful.
H’aanit’s ideal creature captures
The beast tamer of S’warkii is largely considered to be Octopath Traveler’s most interesting and flexible class, and it’s easy to see why when you dive into her unique ability to capture and utilize any number of enemies from the wilderness as her own minions. With the diverse options available to her, H’aanit is a very strong ally to have around, and you can turn her into a powerhouse if you manage to capture a number of very specific creatures easily found in a couple of specific areas in the game.
Taming creatures is an awful lot like taming Pokémon. Creatures have a much lower chance of being caught if they are at full health and unafflicted, so you can increase your chances substantially if you pour some damage into them beforehand. For best results, try reducing the enemy to low health, which you can see when the name under their model turns red. You should also break their armor to zero if they have any, and be sure to use a 3x boosted Capture as well. Do all of the above and you should have no trouble catching your new pets.
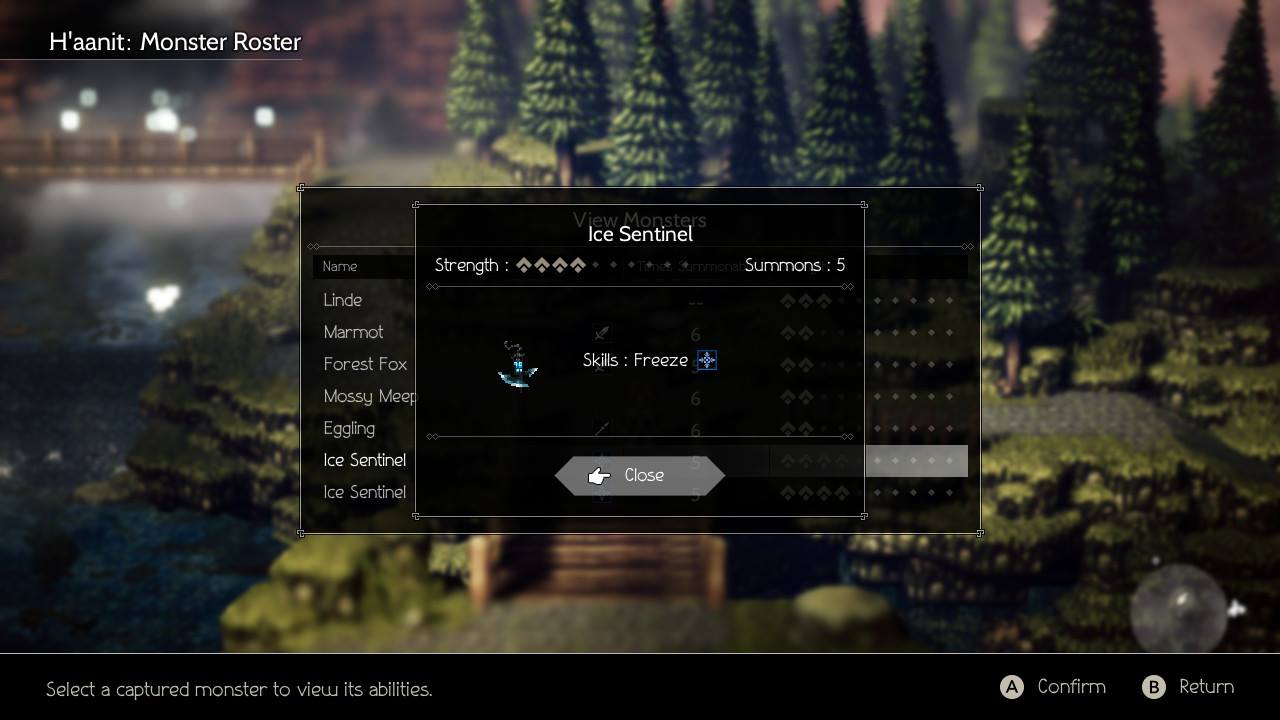
For H’aanit’s dream team you are going to want to capture a bunch of Ice and Fire Sentinels, which look a bit like lanterns with razors attached to them. The Ice Sentinels make an appearance in Therion’s starting mission in the hallways inside Ravus Manor above Bolderfall, and are easily tamed without much effort. Both Ice and Fire Sentinels can also be found in the underground cave underneath the Royal Academy in Atlasdam where Cyrus goes on his initial story mission. Both of these areas can be re-entered after you have completed their respective missions, so don’t worry about having H’aanit with you when you go through them. With a strength rating of four, these sentinels can push out some major fire and ice damage, with max boosted attacks regularly reaching 1500 damage each time. These sentinels can be a great asset when fighting against provoked targets as they are able to dish out big numbers and are easily replenished if you run out of charges.
Once you’re stocked up on Sentinels, your next goal is to try and round out the attack types a bit. Your unlimited use starting pet Linde is great for dishing out both sword and spear attacks, but since you don’t get to choose which one gets used, it can be a little unreliable. To fix this, try and grab yourself one of each specific type. For the sword type, the Ambling Bones, which can also be found inside the underground cave underneath the Royal Academy in Atlasdam, makes for a good choice with their four star damage rating and relatively easy acquisition. For Spear attacks you should capture one of the Hatchlings found in the wilderness outside Borderfall. They don’t hit nearly as hard as the other creatures, but they’re easy to obtain.
The last creature you should try and keep at least one of is the Mossy Meep. This fungus-loving pig is a pocket healer, and while its heals during regular party combat are way too unreliable, it’s a great tool to have at your side when fighting during a provoke, since you’re locked out of your regular healing consumables and fighting solo.
Of course there are plenty more creatures out there, including the rare Cait spawn which if caught can provide incredibly powerful party-wide buffs. Ultimately you should attempt to experiment as much as possible with H’aanit’s diverse creature roster to find a template that works well with the rest of your team. Until then, using the above format will help you cover a whopping six attack types with just one hero, allowing you to break enemies much faster and control the flow of combat with ease.
Primrose’s Powerful Pals

While H’aanit might have the numbers when it comes to potential creature tames, Primrose’s unique ability to allure and temporarily recruit a number of different NPCs should not be overlooked. What’s more, Primrose’s companions can be repeatedly re-allured as any recruited character will return to where you found them after you used up all of their summon charges. Each allured character comes with their own strength rating and ability, and while most of them offer a series of respectable damage and support skills, there are a handful of specific characters that stand out above the rest.
If you’re looking for a way to bolster your defenses then look no further than the generic Cleric in Flamesgrace standing at the exit leading towards the Cathedral. The Cleric comes with a strength rating of one and deals very little damage when they attack, but their base ability—Steel Defenses—is a powerful boon. When cast, Steel Defenses will grant each party member three charges of increased physical and elemental defense. While that alone is a powerful skill to have in your arsenal, the Cleric can cast the skill multiple times, allowing the defensive buffs to stack all the way up to a maximum of nine turns.
If you want to increase your damage output, there are three different characters that you should hunt down. Each one comes with their own unique skill set suited to breaking and exploiting different weaknesses, so you would do well to pair them against the enemies you plan on fighting against. The first is the Elderly Woman standing in front of the save point in Sunshade. She comes armed with a bow and will regularly cast a skill similar to arrowstorm, which attacks all enemies several times with a bow. This is great for taking down enemies with high break values that are weak to bows without having to waste turns with H’aanit.
If it’s high single-target physical damage you’re looking for, then the Crest-bearing Drunk standing outside the Tavern in Atlasdam once you’ve finished Cyrus’s initial story mission is the party member you need. When summoned, the Crest-bearing Drunk can cast Exploit Weakness, which can dish out around 700 damage per hit on average. The drunk can also cast Poison, which is applied for three turns every time it is cast, stacking up to 9 turns maximum. Thanks to his high strength rating, the Crest-bearing Drunk is a solid choice for decent physical damage, but his low success rate means you’ll probably have to try a few times before getting him to join your crew.
The third, and perhaps most powerful, character you can get onto your team early on is Magg the Cook. Magg appears inside the Tavern in Clearbrook once you’ve finished Alfyn’s initial story mission. Once he’s been allured onto your team, Magg can dish out some incredible fire damage to all enemies using a modified version of the fireball skill. Under the right circumstances, this can easily push out anywhere between 500 and 1500 damage per enemy hit, allowing you to clear waves of enemies with ease. Like the Crest-bearing Drunk, Magg has a somewhat low allure success rate so you will have to try a few times before he agrees to sign up with your party.
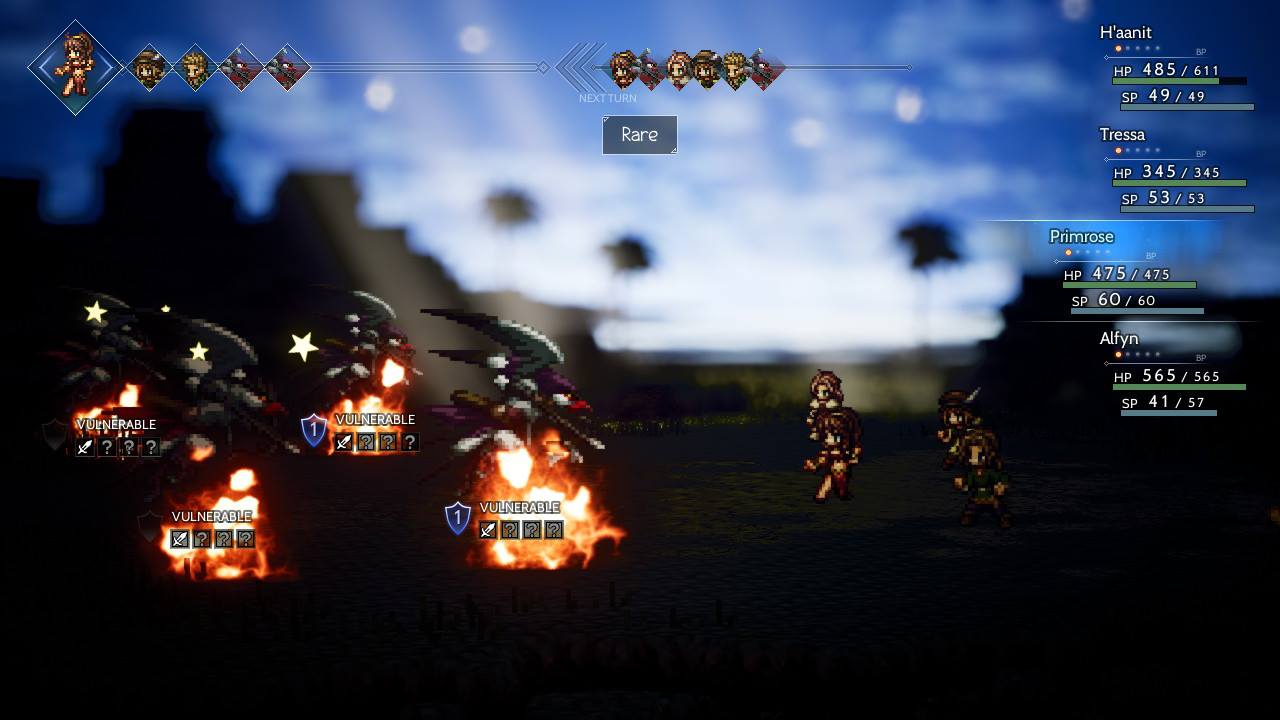
Aside from the characters mentioned above, there are a handful of extremely overpowered allure targets that, when recruited, easily deal more damage than almost every enemy currently available in the early hours of the game. Recruiting these characters comes with a slim 5% success rate, so to get them on your team you’ll either have to repeatedly abuse save files or pay the local Tavern keeper to reset your reputation until they agree to join you. The first character is the Elderly Woman standing in the graveyard on the east side of Clearbrook. There’s also the Old Man hiding inside the house in Lower Bolderfall, which is blocked by the Pauper guarding the doorway that you’ll need to provoke to get past. Both characters come with a fairly low summon count, but each attack from either of them easily dishes out between 2000-2500 damage a hit, and the Old Man specifically comes armed with the Guillotine skill which pushes out around 3500 damage with ease.
Spare time? Take on the optional dungeons
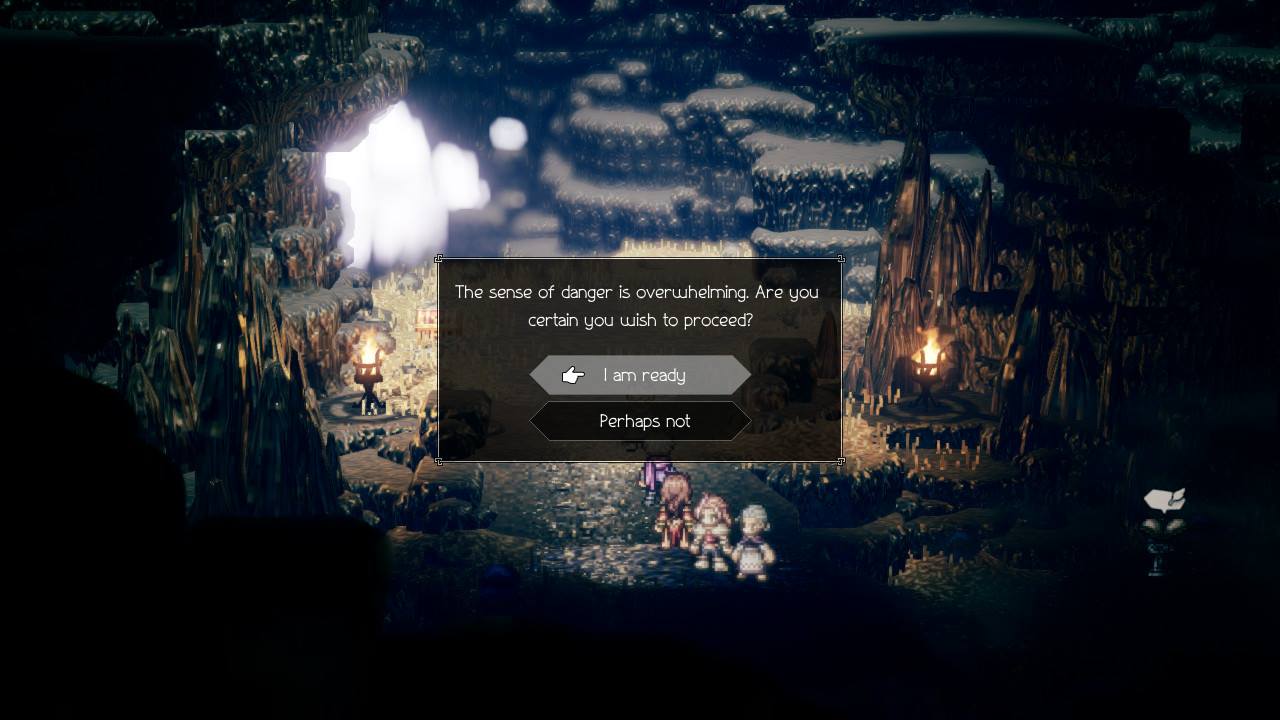
If you’ve finished gathering up a full party of four and are wondering what to do with any spare time you might have left from the allotted three hour time limit, then why not go explore the depths of some of the optional dungeons hiding in the wilderness? So far we’ve uncovered six areas dotted around the starting zones that offer a challenge to anyone brave enough to venture inside. As well as facing off against more difficult opponents, you can also hope to find some powerful gear scattered around inside chests hiding in each area. You will need to make sure you’re prepared before heading into these dangerous zones, however, whether that’s by power levelling your roster or coming armed with some of the overpowered items and allure options available. The most popular choice right now is to equip Alfyn with Golden Axe, which can be stolen by Therion in Clearbrook, and have him use his Last Stand ability, which attacks all enemies with an axe attack dealing damage proportional to the amount of health he currently has.
The optional zones you can explore include:
Carrion Cave (Danger Level 20)—Located at the base of the waterfall in the South Bolderfall Pass between Bolderfall and Clearbrook.
Twin Falls (Danger Level 20)—Located in the South Clearbrook Traverse, found north of the bridge that exits east towards the southern sunshade sands.
Whistling Cavern (Danger Level 20)—Located in Eastern Sunshade Sands, northwest of the western exit heading towards the Southern Sunshade Sands.
Untouched Sanctum (Danger Level 15)—Located in the North Cobbleston Gap up the mountain to the left of the exit heading towards the East Rippletide Coast.
The Whistlewood (Danger Level 15)—Located in the North Atlasdam Flats, northwest from the exit leading towards the East Atlasdam Flats.
Path of Beasts (Danger Level 15)—Located in the West S’warkii Trail and can be found down a sunken pathway directly east of the exit towards the North Bolderfall Pass.
Steal and Scrutinize some swag
Among the ragtag roster of scholars and knights are two very specific characters that each walk very different paths, yet their unique abilities unite them in their potential to track down and acquire some incredibly useful equipment without spending a single penny. With the help of Therion’s steal ability and Cyrus’s Scrutinize skill, these two characters can help you get geared up and fighting fit in no time, even if their methods are a little bit unsavory. Before you go on a shopping spree there are a couple of things you should be aware of when hunting items using these two characters. Firstly, Steal and Scrutinize are both considered Rogue actions, which allows you to attempt them regardless of any level cap limit that is imposed on their noble counterparts. This does mean, however, that if you fail you are penalized, and after five failures in a row, you must then pay the local Tavern keeper to wipe away your bad reputation.
It’s also worth noting that the percentage chance for success is directly tied to the level of the character making the attempt, with higher level characters standing a better chance to achieve a successful roll. With that said, there are a number of very powerful items on the list below that can be obtained early on for a huge advantage, but to acquire them you will usually have to either continuously pay the tavern to erase your bad reputation, or alternatively you can cheat the system a little bit by saving at a nearby pedestal then using your five free attempts, choosing to reload the save and try again if you’re unsuccessful. Of course, both of these options can be time consuming, but the choice is there if you do decide you want to get your hands on some powerful gear early on.
Below you will find a list of every stealable piece of gear, as well as every boost and worthwhile hidden item found through Scrutinize. You should note that consumables are quite common among most NPC item tables so they were omitted for ease of use, so be sure to check every character you come across if you want to stock up on healing and status items as you go. You should also be aware that some of the characters mentioned only appear in their respective towns once you’ve completed the initial story quest linked to the character from that town. We’ve made every effort to show which characters are only available after you’ve completed the relevant quest, but if the character you’re after isn’t where we’ve listed them, you should try and complete the story quest and try looking again.
Lastly, each attempt percentage was recorded while both Therion and Cyrus were between level six to ten, so the successful attempt chances listed are more of a rough guide than a definitive, and you may find the values are slightly different when attempting it yourself.
Sunshade
Steal
Bright Stone—Prevents Blindness, 3% Success Rate [Elderly Woman next to the save spot in Sunshade]
Enlightening Earring—+10 Evasion, 55% Success Rate [Old Man on front steps in Sunshade]
Falcon Dagger—+52 Phys Atk/+22 Evasion, 8% Success Rate [Master’s Lackey guarding Primrose’s starting house to the east of town]
Stimulating Earring—Max SP +10, 55% Success Rate [Master’s Lackey guarding Primrose’s starting house to the east of town]
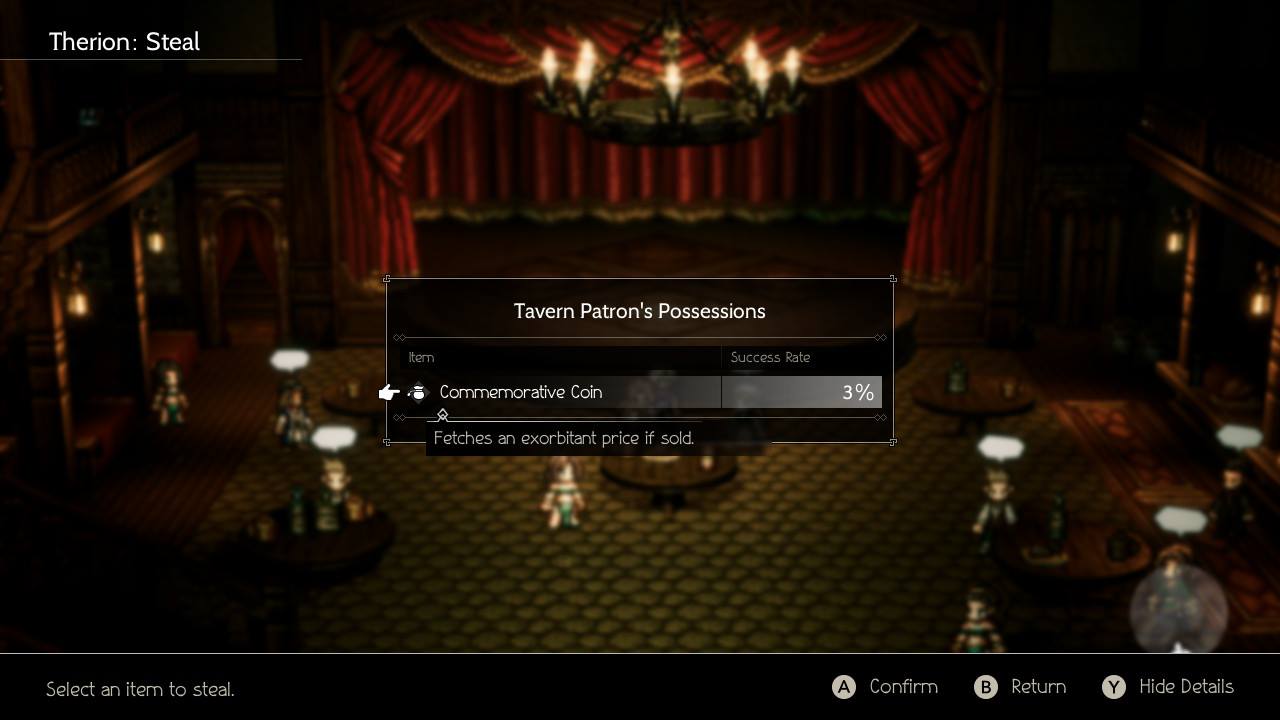
Commemorative Coin—Can be sold for 25,000, 3% Success Rate [Inside Sunshade Tavern, Tavern Patron at the middle table to the left of the Tavern Wench]
Critical Earring—Critical +10, 55% Success Rate [Tavern Wench inside the Sunshade Tavern standing at the middle table]
Protective Earring—Phys Def +10/Elem Def +10, 55% Success Rate [Tavern Patron inside the Sunshade Tavern at the table on the left]
Iron Helm—Phys Def +29, 15% Success Rate [Townsperson blocking doorway in town]
Traditional Dancer Garb—Phys Def +20/Elem Def +22/Max SP +12 [Inside the chest in the house being blocked by the Townsperson]
Inferno Ring—Greatly reduces fire damage taken, 3% Success Rate [Wayfaring Girl in raised square courtyard at the top left corner of the town, requires you to finish the initial story mission of this town’s hero]
Empowering Ring—Max HP +200, 8% Success Rate [Wayfaring Girl in raised square courtyard at the top left corner of the town, requires you to finish the initial story mission of this town’s hero]
Protective Earring—Phys Def +10/Elem Def +10, 65% Success Rate [Amnesiac Girl standing in front of provisioner shop, requires you to finish the initial story mission of this town’s hero]
Wind Amulet—Reduces wind damage taken, 3% Success Rate [Amnesiac Girl standing in front of provisioner shop, requires you to finish the initial story mission of this town’s hero]
Stinging Dagger—Phys Atk +26/Evasion +18/Chance to poison, 65% Success Rate [Faltering Youth inside Sunshade Tavern standing at top left corner table, requires you to finish the initial story mission of this town’s hero]
Scrutinize
Hidden Item: Arcane Glaive—Phys Atk +36/Elem Atk +38, 40% Success Rate [Tavern Wench standing at middle table inside Sunshade Tavern]
Discount at the Inn—50% Success Rate [Tavern Patron standing on the lower table on the left side of the room inside Sunshade Tavern]
Undeniable Allure—40% Success Rate (Townspeople will be more receptive to Allure) [Tavern Patron standing at the upper table on the left side of the room inside Sunshade Tavern]
Cobbleston
Steal
Iron Vest—Phys Def +36/Elem Def +49, 15% Success Rate [Villager standing in front of general store]
Unerring Earring—Accuracy +10, 55% Success Rate [Villager standing outside of the tavern]
Broadsword—Phys Atk +28/Speed +22, 80% Success Rate [Watchman standing outside of the Inn, requires you to finish the initial story mission of this town’s hero]
Iron Helm—Phys Def +29, 65% Success Rate [Watchman standing in the middle of the staircase south of the General Store]
Sturdy Shield—Phys Def +20, 80% Success Rate [Watchman standing in the middle of the staircase south of the General Store]
Silver Spear—Phys Atk +56/Speed +24, 55% Success Rate [Kindly Farmer standing outside in front of the Tavern, requires you to finish the initial story mission of this town’s hero]
Sprightly Earring—Speed +80, 3% Success Rate [Noelle standing on the clearing down the stairs to the west from the Inn, requires you to finish the initial story mission of this town’s hero]
Stimulating Earring—Max SP +30, 8% Success Rate [Noelle standing on the clearing down the stairs to the west from the Inn, requires you to finish the initial story mission of this town’s hero]
Empowering Earring—Max HP +50, 80% Success Rate [Noelle standing on the clearing down the stairs to the west from the Inn, requires you to finish the initial story mission of this town’s hero]
Captain’s Sword—Phys Atk +60/Speed +40/Occasionally decreases target’s Phys Def [Found inside the Captain of the Watch’s house after you remove him from the doorway using provoke.]
Scrutinize
Hidden Item: War Lance—Phys Atk +71/Critical +41, 90% Success Rate [Old man guarding the blocked house at the bottom of the town. Must be provoked/challenged after scrutinizing him to reach the item inside the house]
Hidden Item: Arcane Bow—Phys Atk +38/Elem Atk +52/Occasionally decreases Elem Atk, 50% Success Rate [Villager standing outside of the tavern]
Challenge with Ease—60% Success Rate (Residents of this town more receptive to challenges by Olberic) [Captain of the Watch blocking the door on the western side of town]
More Plentiful Provisions—50% Success Rate (Town smith and armorer have new wares) [Watchman standing outside of Inn, requires you to finish the initial story mission of this town’s hero]
Rippletide
Steal
Memorial Harpoon—phys atk +38/Occasionally slows target, 65% Success Rate [Townsperson at western exit of town]
Dragon’s Scarf—Restores SP after every action, 0% Success Rate (Must be bought with Tressa’s path action) [Marina in Tressa’s parent’s shop]
Beastly Scarf—Restores HP after every action, 0% Success Rate (Must be bought with Tressa’s path action) [Olneo in Tressa’s Parent’s shop]
Stinging Dagger—Phys Atk +26/Evasion +18/Chance to poison, 55% Success Rate [Townsperson outside Tressa’s parent’s shop]
Black Attire—Phys Def +20/Elem Def +28/Evasion +42, 55%Success Rate [Townsperson outside Tressa’s parent’s shop]
Adventurer’s Attire—Key Item, 100% Success Rate [Antique Dealer near the pier on the west side of town, requires you to finish the initial story mission of this town’s hero]
Heavy Bow—Phys Atk +69/Elem Atk +66/Accuracy +44, 8% Success Rate [Tony standing outside of the Tavern, requires you to finish the initial story mission of this town’s hero]
Plate Shield—Phys Def +45/Evasion -4, 55% Success Rate [Mathilda standing opposite the weapon shop, requires you to finish the initial story mission of this town’s hero]
Scrutinize
Hidden Item: Articulate Stone—Prevents Silence, 80% Success Rate [Merchant hiding down the alleyway between the item and weapon shop]
Smarter Bartering—50% Success Rate (Better chance of getting a discount when purchasing items) [Townsperson blocking the doorway to the building opposite the tavern]
Discount at the Inn—70% Success Rate [Townsperson standing at the western exit]
Atlasdam
Steal
Sprightly Earring—Speed +10, 55% Success Rate [Guard at eastern exit]
Iron Armor—Phys Def +50, 8% Success Rate [Guard inside tavern on western side of town]
Iron Axe—Phys Atk +24/Accuracy +12, 80% [Guard inside tavern on western side of town, requires you to finish the initial story mission of this town’s hero]
Empowering Earring—Max HP +50, 55% Success Rate [Guard standing at stairway at the save point in front of the Atlasdam Palace Gate]
Stimulating Earring—Max SP +10, 80% Success Rate [Guard inside the Atlasdam Palace at foot of stairs]
Elusive Shield—Phys Def +21/Elem Def +24/Evasion +56, 3% Success Rate [Boy on far right on ground floor of Palace, next to some boxes]
Silver Spear—Phys Atk +56/Speed +24, 3% Success Rate [Boy on far right on ground floor of Palace, next to some boxes]
Stone Bow—Phys Atk +29/Accuracy +33/Occasionally Blinds, 3% Success Rate [Boy on far right on ground floor of Palace, next to some boxes] *Can get this for free inside the blocked house in S’warkii
Composite Staff—Phys Atk +18/Elem Atk +44/Occasionally causes Sleep, 3% Success Rate [Boy on far right on ground floor of Palace, next to some boxes]
Critical Earring—Critical +10, 65% Success Rate [Crest-bearing Drunk standing outside of the tavern, requires you to finish the initial story mission of this town’s hero]
Buckler—Phys Def +3/Elem Def +3, 80% Success Rate [Obstinate Merchant standing to the left of the provisioners shop, requires you to finish the initial story mission of this town’s hero]
Pointed Hat—Phys Def +9/Elem Def +21/Elem Atk+8, 80% Success Rate [Obstinate Merchant standing to the left of the provisioners shop, requires you to finish the initial story mission of this town’s hero]
Bronze Vest—Phys Def +19/Elem Def +24, 80% Success Rate [Obstinate Merchant standing to the left of the provisioners shop]
Silver Hairpiece—Phys Def +10/Elem Def +18/Max SP +10, 65% Success Rate [Merchant standing outside of the library to the left of the entrance, requires you to finish the initial story mission of this town’s hero]
Feathered Hat—Phys Def +15/Elem Def +15, 80% Success Rate [Merchant standing outside of the library to the left of the entrance, requires you to finish the initial story mission of this town’s hero]
Linen Robe—Phys Def +13/Elem Def +33/Elem Atk +8, 80% Success Rate [Merchant standing outside of the library to the left of the entrance, requires you to finish the initial story mission of this town’s hero]
Scrutinize
Discount at Inn—100% Success Rate [Man standing outside the Inn]
New weapons for sale—100% Success Rate [Guard at eastern exit]
Smarter Bartering—100% Success Rate (Better chance of getting a discount when you purchase items) [Child in middle plaza between the Tavern and Item shop]
Guide With Ease—100% Success Rate (The residents of this town will be more receptive to your guidance) Apothecary near northern exit to palace]
The Jellypeno—90% Success Rate (Key item—“A tip from a reliable source about a potentially profitable vegetable”) [Know-it-all Milo standing outside of the royal academy on the right]
The Song of Sokrath—60% Success Rate (Key Item—“Lyrical information about a legendary knight”) [Handsome Minstrel standing at the balcony overlooking the palace along the exterion western wall of the academy]
Hidden Item: Buckler—Phys Def +3/Elem Def +3 [Boy on far right on ground floor of Palace, next to some boxes]
Flamesgrace
Steal
Silver Sword—Phys Atk _52/Speed +30, 15% Success Rate [Provoke lady blocking door to house on eastern side of town. Item found on Sellsword inside the house]
Headgear—Phys Def +25/Elem Def +28, 15% Success Rate [Provoke lady blocking door to house on eastern side of town. Item found on Sellsword inside the house]
Iron Vest—Phys Def +36/Elem Def +49, 15% Success Rate [Provoke lady blocking door to house on eastern side of town. Item found on Sellsword inside the house]
Sprightly Earring—Speed +10, 55% Success Rate [Tavern Patron inside Tavern]
Peacebringer’s Garb—Phys Def +30/Elem Def +39/Max HP +98, 15% Success Rate [Merchant standing in the street on the western side of the weapon shop]
Traditional Dancer Garb—Phys Def +20/Elem Def +22/Max SP +12, 55% Success Rate [Townsperson standing on staircase in front of the chapel] *Can get this if you provoke the townsperson blocking the doorway in Sunshade and loot the chest behind her.
Circlet—Phys Def +15/Elem Def +25/Max SP +15, 15% Success Rate [Townsperson standing on staircase in front of the cathedral]
Critical Earring—Critical +10, 55% Success Rate [Cleric at entrance inside the Cathedral]
Composite Staff—Phys Atk +18/Elem Atk +44/Occasionally Sleeps, 55% Success Rate [Witness standing in front of weapon shop. requires you to finish the initial story mission of this town’s hero]
Dungeon Key—Key Item, 100% Success Rate [Drunken Soldier inside the Tavern. requires you to finish the initial story mission of this town’s hero]
Scrutinize
Guide with Ease—50% Success Rate [Cleric standing near northern exit between the town and the outer cathedral area]
Discount at the Inn—80% Success Rate [Townsperson standing on staircase next to jail cell in front of the cathedral]
Hidden Item: Empowering Earring—Max HP +50, 50% Success Rate [Cleric standing in front of doorway leading into the Cathedral]
Hidden Item: Heavy Blade—Phys Atk +85/Critical +30, 40% Success Rate [Cleric standing inside Cathedral directly in front of entrance]
New weapons for sale—100% Success Rate [Cleric standing at the altar in the Cathedral]
Rumors of a Knight Ardante—90% Success Rate (Key Item—“Hearsay about a knight revered by his peers”) [Former Knight Ardante sitting in front row of Cathedral, requires you to finish the initial story mission of this town’s hero]
Where the Ice Giant sleeps—90% Success Rate (Key Item—Information about the Jotunn in Hoarfrost Grotto) [Muttering Codger standing at the railing overlooking the Cathedral to the west of the tavern, requires you to finish the initial story mission of this town’s hero]
An Eyewitness Account—90% Success Rate (Key Item—“It seems someone else was there that day, and can prove a certain man’s innocence”) [Witness standing outside in front of the weapon shop, requires you to finish the initial story mission of this town’s hero]
S’warkii
Steal
Headgear—Phys Def +25/Elem Def +28, 15% Success Rate [Villager at northern exit of town]
Sprightly Earring—Speed +10, 55% Success Rate [Fledgling Hunter outside of the inn]
Stimulating Earring—Max SP +50, 55% Success Rate [Ashlan standing in front of weapon/provision shop, requires you to finish the initial story mission of this town’s hero]
Battle Axe—Phys Atk +40/Accuracy +6, 55% Success Rate [Hunter in southeast corner of town]
Critical Earring—Critical +10, 55% Success Rate [Old Storyteller inside the inn]
Stone Bow—Phys Atk +29/Accuracy +33/Occasionally Blinds [Not stolen but lockpicked inside the house blocked by a townsperson. Provoke then enter to see chest]
Enlightening Earring—Evasion +10, 55% Success Rate [Boy inside blocked house. Provoke person outside to enter]
Arcane Bow—Phys Atk +38/Elem Atk +52/Occasionally decreases Elem Atk, 15% Success Rate [Village Headman near the western exit of the town]
Arcane Hatchet—Phys Atk +36/Elem Atk +36, 65% Success Rate [Hunter at western exit of town]
Giant Tusk—Key Item, 100% Success Rate [Nomadic Hunter located outside of town at the exit leading towards the Western Flamesgrace Wilds]
Wind Attire—Phys Def +24/Elem Def +26/Speed +22, 80% Success Rate [Nomadic Hunter located outside of town at the exit leading towards the Western Flamesgrace Wilds]
Scrutinize
Provoke Like a Pro—50% Success Rate (Always gain initiative when provoking residents of this town) [Villager standing at the Northern exit]
Tale of the Beast Tamers—90% Success Rate (Key Item—“The beast tamers of the Greenwood tribe used forbidden magic and lost their minds to the monsters they sought to control”) [Old Storyteller inside the Tavern]
Discount at the Inn—70% Success Rate [Villager blocking the house next to the weapon/item shop]
Hidden Item: $1000—50% Success Rate [Female hunter standing outside of the entrance to the Tavern. The item can be found inside the blocked house to the left of the weapon shop.]
How to Train a Tiger—70% Success Rate (Key Item—“Details on the little-known art of tiger rearing”) [Scholar of Beasts at the top of the stairs leading down to the Tavern]
Byron Family Lineage—80% Success Rate (Key Item—“The History of the once-noble house of Byron”) [Highbrow Historian standing at the bottom edge of the village opposite the weapon shop]
More Plentiful Provisions—30% Success Rate (The town smith and armorer have new wares) [Hunter standing at the exit to the west]
Bolderfall
Steal
Iron Axe—Phys Atk +24/Accuracy +12, 100% Success Rate [Townsperson to the right of the Inn up the stairs]
Iron Spear—Phys Atk +23/Speed +6, 100% Success Rate [Townsperson to the right of the Inn up the stairs]
Composite Bow—Phys Atk +18/Elem Atk +16/Accuracy +20, 100% Success Rate [Townsperson to the right of the Inn up the stairs]
Arcane Bow—Phys Atk +38/Elem Atk +52/Occasionally decreases Elem Atk, 15% Success Rate [Industrious Husband in the small square behind the Inn]
Enlightening Earring—Evasion +10, 100% Success Rate [Merchant in the small square behind the Inn]
Stimulating Necklace—Max SP +80, 3% Success Rate [Stern Guardman at front of house behind the Inn, requires you to finish the initial story mission of this town’s hero]
Stimulating Earring—Max SP +10, 55% Success Rate [Stern Guardman at front of house behind the Inn, requires you to finish the initial story mission of this town’s hero]
Enlightening Earring—Evasion +10, 55% Success Rate [Enlightening Aristocrat inside the house behind the inn]
Rebel’s Axe—Key item, 100% Success Rate [Pauper at foot of stairs leading down to Lower Bolderfall, requires you to finish the initial story mission of this town’s hero]
Iron Dagger—Phys Atk +20/Evasion +16, 65% Success Rate [Veteran Brigand near foot of stairs in Lower Bolderfall, requires you to finish the initial story mission of this town’s hero]
Sprightly Earring—Speed +10, 55% Success Rate [Veteran Brigand near foot of stairs in Lower Bolderfall, requires you to finish the initial story mission of this town’s hero]
Spear of Justice—Key Item, 100% Success Rate [Pauper blocking door to house in Lower Bolderfall, requires you to finish the initial story mission of this town’s hero]
Revolutionary Sword—Key Item, 100% Success Rate [Pauper Revolutionary to the right of the tavern in Lower Bolderfall, requires you to finish the initial story mission of this town’s hero]
Iron Helm—Phys Def +29 [Found inside locked chest in the area outside of the manor above Bolderfall, requires you to finish the initial story mission of this town’s hero]
Wakeful Stone—Prevents Sleep, 100% Success Rate [Guard Captain standing in front of entrance gates to mansion above Borderfall], requires you to finish the initial story mission of this town’s hero
Scrutinize
Thieving Tips & Tricks—70% Success Rate (Greater chance of success when stealing items) [Townsperson standing against the west-facing wall of the item shop, towards the northern exit of the town]
Discount at the Inn—60% Success Rate [Old Man blocking access to the building next to the item shop]
Hidden Item: Falcon Dagger +52 atk/+22 Evasion, 40% Success Rate [Elderly Woman standing next to the Old Man blocking the door to the building next to the item shop. Item is inside the blocked building to get the Inn discount before fighting the Old Man]
New Weapons for Sale—60% Success Rate (Town smith and armorer have new wares) [Townsperson standing on top of the stairs to the right of the Inn]
Hidden Item: Elusive Shield—Phys Def +21/Elem Def +24/Evasion +56 [Guard Dog on the far right edge at the entrance gate to the Ravus Manor overlooking Bolderfall, requires you to finish the initial story mission of this town’s hero]
Hidden Item: War Spear—Phys Atk +34/Speed +10, 80% Success Rate [Guard on the right side of the entrance gate to the Ravus Manor overlooking Bolderfall, requires you to finish the initial story mission of this town’s hero]
Challenge with Ease—60% Success Rate (The residents of this town are easier to challenge with Olberic) [Guard standing behind the pack of dogs at the entrance gate to Ravus Manor overlooking Bolderfall, requires you to finish the initial story mission of this town’s hero]
Clearbrook
Steal
Steel Axe—Phys Atk +96/Elem Atk -20/Occasionally decreases targets Elem Atk, 8% Success Rate [Townsperson at western exit of town]
Silver Hairpiece—Phys Def +10/Elem Def +18/Max SP +10, 55% Success Rate [Granddaughter blocking the house on the western side of town]
Protective Earring—Phys Def +10/Elem Def +10, 55% Success Rate [Granddaughter blocking the house on the western side of town]
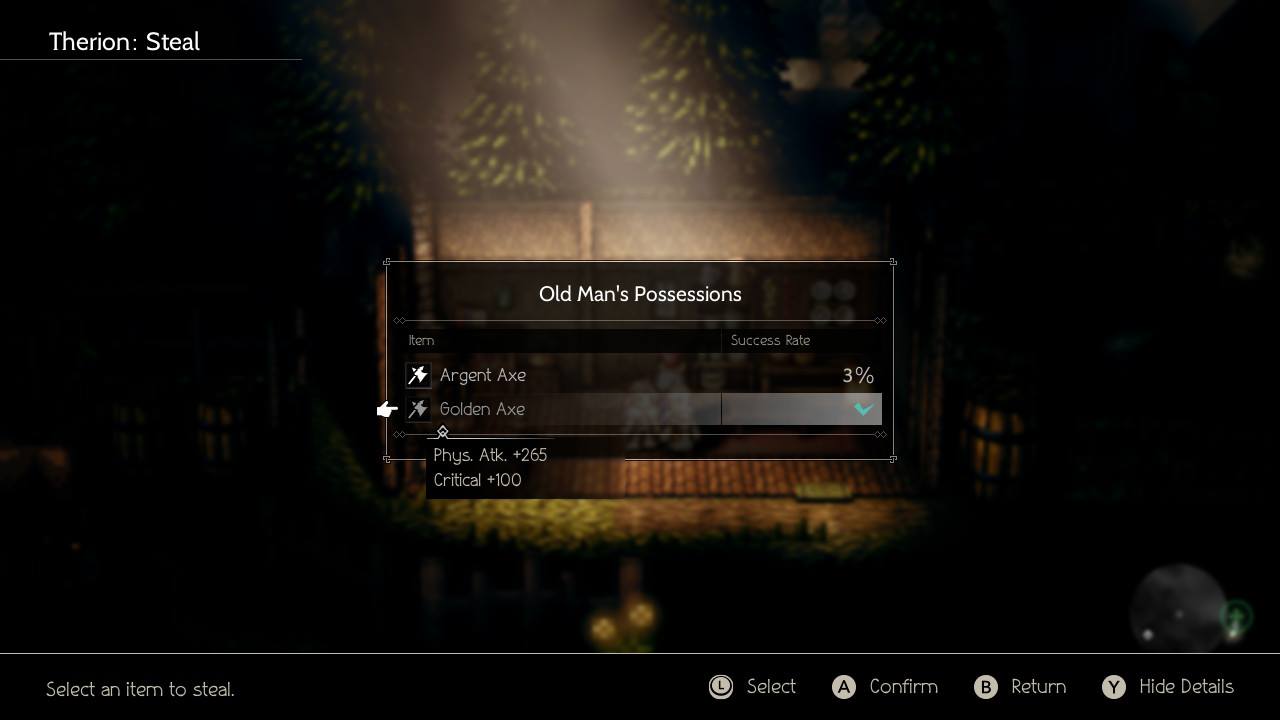
Argent Axe—Phys Atk +122/Critical +48, 3% Success Rate [Grandfather inside house blocked on western side of town. Provoke Granddaughter to get inside]
Golden Axe—Phys Atk +265/Critical +100, 3% Success Rate [Grandfather inside house blocked on western side of town. Provoke Granddaughter to get inside.]
Iron Vest—Phys Def +36/Elem Def +49, 15% Success Rate [Scholar near eastern exit of town]
Battle Axe—Phys Atk+40/Accuracy +6, 80% Success Rate [Gertas standing in front of the weapon and item shop]
Protective Earring—Phys Def +10/Elem Def +10, 80% Success Rate [Meryl’s Mother standing in front of the Inn]
Scrutinize
Discount at the Inn—90% Success Rate (lodgings in the town are now cheaper) [Townsperson at western exit of the town]
Hidden Item: Silver Axe—Phys Atk +43/Accuracy +12, 30% Success Rate [Granddaughter that is standing in front of the blocked house on the western side of town]
More Plentiful Provisions—90% Success Rate (Town smith and armorer have new wares) [Regular Patron inside the Tavern, requires you to finish the initial story mission of this town’s hero]
Andy Moore is a gaming freelancer based in the UK. When he’s not writing, he can be found staring blankly out of the nearest window, or spending way too much time on Twitter.