The life of a pirate can be tough. Constantly chasing the next big payday across the open waves, with every new horizon bringing you fortune, favor, or a large metal ball hurtling towards your face. With the risks always weighing up against the rewards, getting about in the turbulent world of Sea of Thieves can be a little tricky. So we’ve thrown together our own little treasure trove of tips to get you fighting fit for whatever the ocean throws at you. Except for the kraken—you’re on your own with that one.
Mastering the waves
To thrive on the harsh ocean waves, you’re going to need to know how to pilot your vessel with the skill and grace befitting of a pirate legend. While the two current ship types aren’t necessarily difficult to understand, there are a number of nuanced tweaks and changes that each crew member can make as you travel that can help you go faster, turn quicker, and generally get more out of your ship than if you were to just sit around playing sea shanties the entire time.
First up is understanding how the sails work, and how different sail heights can have an impact on how fast your ship travels and turns. Right now, the game considers there to be three main ‘states’ that a sail can be in: Full, half and drawn. As you might have guessed, full sails means you’re catching the most wind which is great for trying to travel long distances across open water for when you want to outrun or catch up to an enemy vessel. When you want to make precise movements, however, like trying to dock your boat, or when attempting to navigate through tight spaces and past jagged rocks, full sail is much too powerful and cumbersome. In those situations you should make sure you put the sails to half mast. During half mast you’ll still catch some wind, but your speed is reduced dramatically, and the turning speed is increased to make it much easier to perform tighter turns. The last state is fully drawn, and the only time you’ll ever need to use this sail type is when you’ve found your boat stuck in a tight space and you need to turn on the spot. To do this, raise the sails fully and then raise your anchor, at which point the ship should start to rotate on the spot, allowing you to free your vessel without causing too much damage to the hull.
The next thing you’ll want to wrap your head around is the ship’s anchor. Aside from bringing the ship to a halt, the anchor can be used strategically to help you perform incredibly nimble turns and maneuvers out on the waves, allowing you to essentially do handbrake turns that rotate you almost 180 degrees to face the opposite direction. This requires a bit of coordination to pull off, though. To do this, you’ll want to make sure the ship’s wheel is fully steered in the direction you want to turn to. Once you’ve lined up the wheel, drop the anchor and then as soon as it bites into the ground, start raising it once more. If done right, you should now be facing the other way, and while you will have lost momentum, you can quickly regain that after a few seconds of sailing. If you’re playing as a group and know that you need to make a quick getaway, you can also have one crew member pre-load the anchor by raising it up until just before the final click, which is one full rotation from the point you start turning. Since the ship won’t properly raise the anchor until you hit the final inch, it’s a great way to quickly take off in a hurry.
One of the least used features when sailing a boat is the ability to direct the sails in order to catch directional wind currents. While your boat will naturally sail regardless of whether you do this or not, an observant crewmate can pay attention to the swirls of wind that appear up above the boat and turn the sails to catch this, granting the boat a considerable boost to speed while the sails are at the right angle. This can be a great way to outrun or escape other vessels, and is especially useful when travelling long distances as it can reduce travel time considerably.
Grinding for gold and reputation
A pirate is defined by the size of their booty, and in Sea of Thieves there’s plenty of ways for you to make some coin out on the high seas. Ultimately, earning a bit of spending money will force you to interact with one of the game’s three factions: The Merchant Alliance, the Order of Souls, and the Gold Hoarders. Each group specializes in accepting different types of relics and loot, and will pay you those sought after coins for any items in their field of interest. Some items are worth more than others, however, and the effort involved in getting some of these valuable items isn’t always worth the payoff you get in the end.
Let’s start with the Merchant Alliance, traders of commodities, livestock and general sundries. These savvy salesfolk will happily exchange some coin and reputation for any chickens, pigs and snakes you may have caught with a cage, as well as full crates of goods and any gunpowder kegs you might have laying around the ship. Out of the three factions, this is perhaps the hardest to progress through. Not only do the rewards often offer little in the way of gold and reputation, voyages for this company also often require you to hunt specific animals and goods without providing you with any direction or guidance on where find these goods. The best tactic when hunting for animals is to head to the larger islands, as it would seem that these have a higher population of animals on them, although you may still have to check several other islands if you don’t get lucky and find what you need on your first attempt.
If you’re determined to grind out that Merchant Alliance reputation, there is a way to stock up on a large number of cages before setting off from the outpost. Simply accept and start a voyage, grab the required cages, and then abandon the quest, which will leave you with the cages you were about to use. By exploiting this little mechanic, you can easily build a surplus of cages and simply capture everything you see as you travel, giving you a little cache of animals for when you start new voyages. It’s worth noting however that captured pigs need to be fed once every few minutes, so it’s not recommended to stockpile pigs as you’re going to quickly run out of bananas.
Next up is the Order of Souls, a group dedicated to collecting the haunted skulls of former pirates. With a keen focus on fighting skeleton hoards, completing voyages for these bone-loving folk is always quite straightforward, with each quest telling you exactly where to go and how many skulls you need. Simply hop onto your vessel, make port at the specified island and slay a few waves of underwhelming skeletons before finishing off the boss versions when they appear. Skeleton skulls of the bosses aren’t anything fancy, but you can sometimes find rarer ones that sell for a significant amount, with some netting well over 1000 gold pieces at a time. The only downside to completing these voyages is that as you fight, you’re likely going to consume a lot of bananas, so be sure to scavenge any of those big yellow medicinal fruits as you travel from island to island.
The last of the factions is the most lucrative, but it also comes with much more risk. The Gold Hoarders have you jumping between several islands at a time, searching for buried treasure to dig up and haul back to their outpost tents. Voyages for these money hungry hoarders can vary wildly in difficulty, with some quests requiring you to complete several maps in succession before fully completing. Sometimes instead of being shown an X mark on a map, you’ll be given a riddle, and these riddles can vary in difficulty from incredibly easy to painfully obscure, so be sure to bring your smartest crew member when making port on an island. The dangerous part about doing jobs for this faction is that you’re often docked for long periods of time on very popular islands when hunting for treasure, and voyages can sometimes see you amass large numbers of chests which are ripe for the taking by any nearby aggressors. The best practice when tackling Gold Hoarder voyages is to build up a small collection of about four or five chests before cashing them in at an outpost, just to be sure that you’re not going to waste a big chunk of time and effort only to lose out when you try to get your rewards.
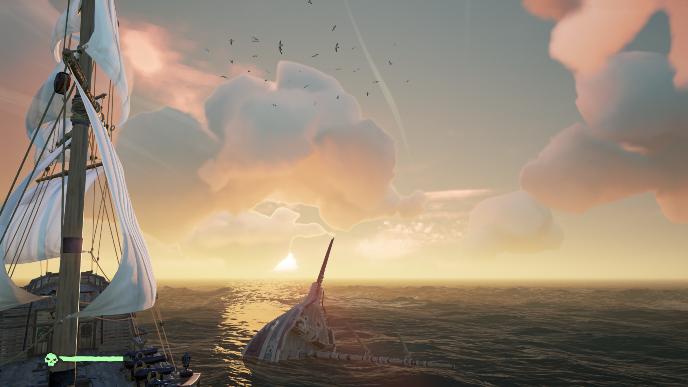
Aside from plodding along under the instruction of a major faction, perceptive pirates can also hope to make a quick buck on the high seas thanks to any number of shipwrecks that can be found bobbing along the ocean waves. Scavenging these little pockets of wreckage can be a great way to secure anything from low end materials like wood and bananas to valuable and high ranking chests and skulls, as well as the occasional message in a bottle which often grants bonus Gold Hoarder quests. To spot a shipwreck, look out for circling birds on the horizon, as they will often telegraph either barrels or a shipwreck for you to plunder. Once you’ve sailed up to the overturned boat, simply dive inside and have a poke around, but be careful as sharks have a tendency to attack anyone trying to ferry plundered goods back to the main boat.
Fortunate Forts
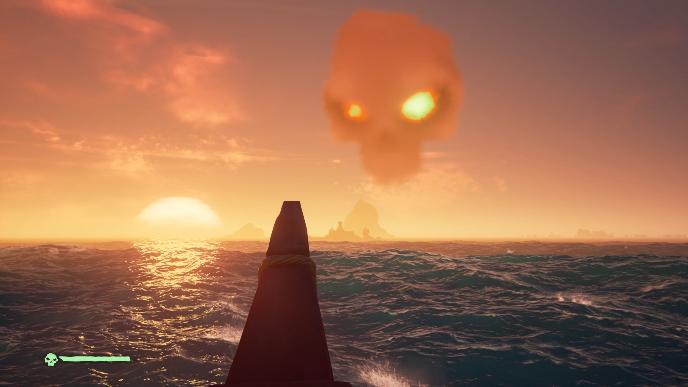
Beyond the toil of the factions, there’s one other way pirates can earn their keep on the waves, and that’s by besieging skull forts. These ominous and deadly island fortresses give off an eerie skull cloud when active, and can be attacked by any nearby players in an attempt to lure out the fort captain, who in turn drops a key to a very big stash of plunder. Don’t be fooled, however—the skeletons on these forts are much more aggressive than you will find elsewhere, and they can come in one of several variants that each have different strengths and weaknesses. Only the best and most persistent pirates can properly defeat a skull fort, and even if you are successful, since skull clouds can be seen from miles away, there’s no guarantee you’ll get to keep all the spoils if another player sails over and disputes your claim.
So how do you clear out a skull fort then? Well, to start, you have to reach the island, which is always guarded by several outer towers that will unleash a volley of cannon fire towards your ship. These towers are usually accurate and can do some serious damage if you’re not prepared for it. To counter this, if you’re playing as a team of two or more people, have one person jump off when the boat gets near and get them to climb up the towers and take out the skeletons inside. Once you’ve made it to the island you will then need to start fighting wave after wave of skeletons until the fort boss eventually appears. You’ll know you’ve cleared a wave because the music will play a little chime each time a new wave appears.
The waves of skeletons are always comprised of one specific type of the four variants that appear, and there’s a few things you should be aware of when fighting each group:
Normal: These act much like other skeletons you’ve fought before, albeit with a little bit more health. They like to swarm players and surround them, so be sure to keep moving and not let them trap you against walls.
Shadow: The shadow type is shrouded in an eerie mist that protects them from damage, and the only way to weaken them is to shine a light from your lantern at them. Shadow skeletons can be quite tough as they often require the help of another player to deal with them properly, but if you find yourself fighting one solo, you do have a couple of seconds to attack before their defensive mist comes back after shining your light on them.
Leaf: These seaweed skeletons act much like the normal type, except that they become empowered when standing in water, and they are a little weaker to melee attacks too. To deal with them, make sure you keep them away from sources of water and dispatch them with your sword.
Gold: The gold skeletons move slowly, but have a high defense against melee attacks. Fortunately, they are incredibly weak to water and will move at a crawl when touching any source of water. To deal with these skeletons, lead them to any nearby pools and then shoot them from a distance.
When the boss skeleton does eventually spawn, it will be the same type as the wave it appears with, so make sure you follow the same tactics when fighting it. A good tip is to save an explosive barrel that can typically be found on the island, and then lead the boss into it to deal considerable damage and finish it off quickly. Killing the boss skeleton will cause the rest of the enemies to disappear.
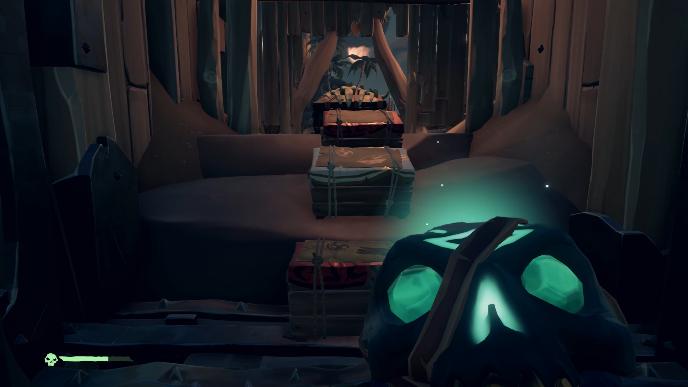
Once you’ve cleared the boss and gained access to the vault underneath the fort, you should try and ferry the valuable loot inside back to your vessel as quickly as possible. There’s no telling whether any other players will be waiting for you to finish up before swooping in and taking your hard earned gold, so you’ll have to decide whether to have some crew members keeping a lookout for enemies at the cost of a speedy exit.
Dealing with the competition
Sooner or later you will end up bumping noses with another pirate on the seas, and your encounter might not be very cordial. There’s more than a few opportunistic scallywags lurking on the waves just waiting to take your hard earned treasure, and you would do well to learn how to deal with potential threats if you want to make sure your treasure stays in your own hands.

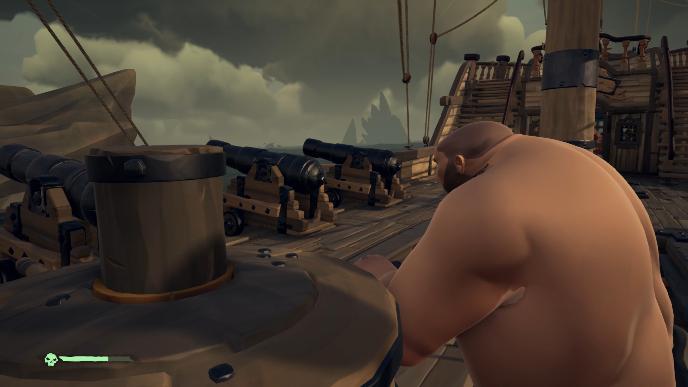
Sooner or later you’re going to get involved in ship on ship combat, and there’s a few misconceptions and misunderstandings flying around that you should be aware of. Firstly, it’s harder to sink a ship than you would think. If you’re fighting against an evenly matched team or three or four people, both teams should be able to easily cope with repairs and bailing water while still returning fire. Herein lies the problem, as simply exchanging shots usually means the fight is going to boil down to a war of attrition, where the team with the most wooden boards and cannon balls eventually wins. You can help to fight against this however by making sure those manning the cannons on your ship aim slightly under the sea line on the enemy vessel. By hitting the lowest decks of the enemy ship, you’ll create much more prominent holes in the hull, which in turn cause the ship to fill up much faster. Do this enough and you will likely force the enemy to route more of their crew towards the lower decks, leaving you free to pepper their ship with holes faster than they can do to you.
Of course, sometimes conventional methods just won’t cut it, and in those cases there are a couple of ways for you to deal with your attackers providing you’re quick enough and able to think on your feet. The most common alternative method to deal with enemy ships is to board them with an explosive barrel. Once onboard, sneak down to the lower decks and ignite the barrel with your firearm, then watch as the unsuspecting crew members panic and rush down below deck, leaving them completely open for a few sneaky attacks as they scramble to fix their ship. If you get lucky, you may even be able to wipe out an entire crew by killing them off, sinking their ship in the process.
If you don’t have access to an explosive barrel, you can always try lowering their anchor, temporarily halting their ship while the rest of your crew makes a quick getaway. You’ll probably die in the course of trying either of these options, but given that respawning is fairly quick and you’ll appear back on your own ship, it’s often worth the sacrifice. So long as your ship survives, you’ll always be able to spawn there, so make sure saving the vessel is a priority and you’ll soon find yourself making death defying acts of espionage as you sneak onto enemy boats and secretly mess with them.
Andy Moore is a gaming freelancer based in the UK. When he’s not writing, he can be found staring blankly out of the nearest window, or spending way too much time on Twitter.