With its lovable characters and cartoony zest, Fortnite Battle Royale has grabbed the spirit of battle royale games by the horns and ran with it. With more memes, crazy rocket-riding jousts, and enough wooden planks to build a boat, the team at Epic have taken the hardboiled formula of 2017’s biggest multiplayer game and made it whimsical. An absurd number of people have since taken notice and are flocking to the arena shooter en masse. If you’re one of the millions of people diving into the battleworn shores of Fortnite, we’ve got a whole bunch of tips and advice to get you to the finish line.
Where to land
The very first decision you’ll have to make at the start of each round is where you’re going to land. In other battle royale games this is usually determined by the popularity of the area and the potential to find high-end gear early on in the match, and while the same rules apply in Fortnite, there’s the added factor of the likelihood of finding golden chests to consider when picking your landing zone. Getting your hands on these chests can let you access some decent gear so they are worth seeking out, but you should keep in mind that the chances of them spawning in the same location every round can vary, so heading to places where more than one typically spawn is your best bet to securing that loot.
While the golden chests spawn all across the map, some places are better than others, and you’re likely to find your own favorite spots after a while. Until then, here are a few good locations to aim for in those first few tentative matches:
Nestled onto the flattened plains of the northeastern edge of the map, this town doesn’t boast a huge number of potential spawns, with about five or six golden chests known to spawn in central buildings as well as the surrounding households. Fortunately this does mean that most players overlook this slimmed down town in favor of the surrounding neighborhoods, so heading here is a great way to touch down onto solid ground without worrying too much about competition.
To find the lucrative chests, you’ll want to make sure you check out the main building with the tomato mascot on it, as well as the isolated house to the west, the wooden bridge to the east, and the tunnel cutting through the mountain in the west. Once you’ve cleaned out the area, you can either choose to reposition closer to wherever the circle has appeared, head into the mountain tunnel to hunker down, or proceed southeast towards the shipping yard if you still need to find more gear.
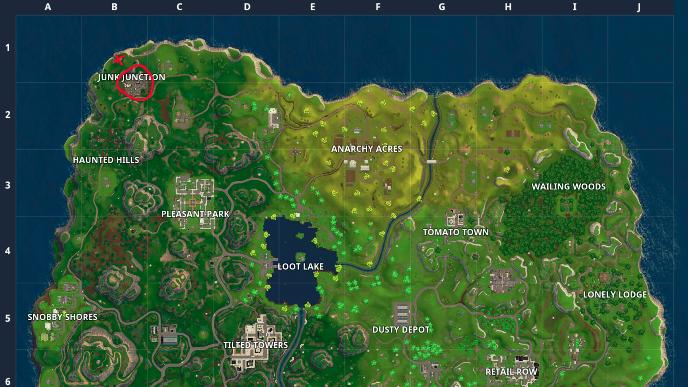
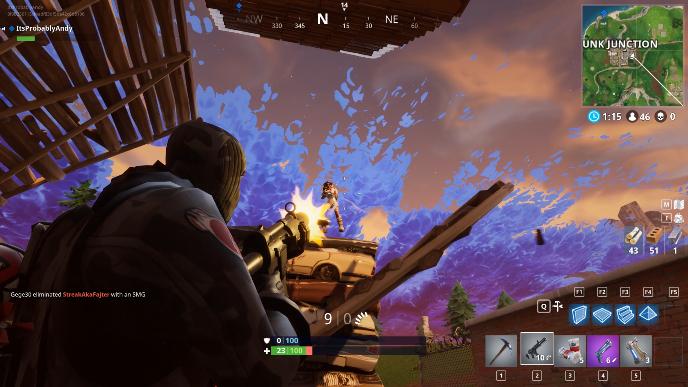
Junk Junction The northwestern tip of the island is home to a giant metal llama and a scrapyard full of wrecked metal cars and more golden chests than you can shake a pickaxe at. Many find this area too out of the way to bother checking, so if you’re feeling lucky and don’t mind running in case the circle appears a fair distance away, this little junk haven is the perfect place to get yourself stocked with firepower.
To find the chests here, you should first attempt to land on the head of the metal llama. Chances are there should be at least once chest inside it, either inside the top of the head or underneath at the underbelly area. From here, head south towards the scrapyard and make sure to check on top of the piles of wrecked cars, the separate building on the western edge of the compound, inside the yellow compactor on the northern edge, as well as inside the central building, taking special care to check the room on the roof. Once you’re fully stocked either head south towards the Haunted Hill for more chances at finding gear, or head towards wherever the circle is located.
Prison
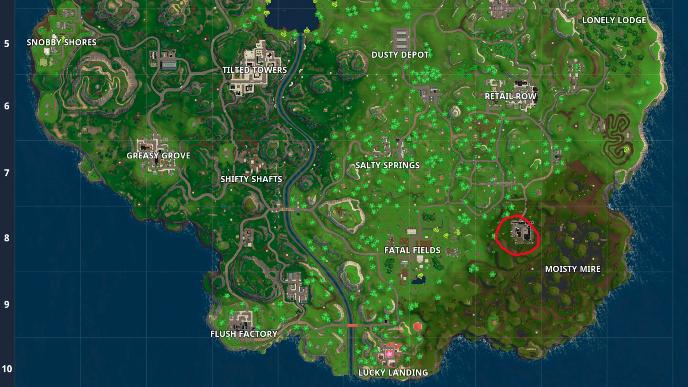
Located on the edge of the Moisty Mire in the southeast of the island is an unlabelled prison compound which plays host to a number of golden chests for you to plunder. This location is great if the bus ends up travelling across the southern coast of the island and offers a decent alternative in case you want to switch things up a bit. It’s worth noting however that almost every time I’ve landed here, there’s been at least one other person contesting the loot, so be prepared to fight for your spoils if you choose to touch down here.
To find the golden chests be sure to check inside the three guard towers on the northeast, northwest and southern edges of the compound. There’s also a chance for one chest to spawn inside the smaller central building, as well as up to three chests inside the larger building on the eastern edge. These can sometimes be quite difficult to find, however, so be sure to listen out for the telltale radiant hum that golden chests give off to help you find your way.
So you’ve managed to survive long enough to get yourself a number of weapons and shield potions, but what do all these colors actually mean? In Fortnite, loot is divided into rarity categories ranging from white (common), which is the most frequent and least effective, all the way up to orange (Legendary), which is the least frequent and most effective. To put it simply, a white gun is always going to do less damage than an orange one, so when picking which items to take, you should almost always opt for higher rarity equipment. Try to keep in mind what ammo you have available too, as there’s no point ditching your current firearm if you’re running dry on the weapon you’re about to pick up, unless you’re sure that you’re going to come across an ammo box or some loose rounds before your next skirmish.
One notable exception to this, however, is the newly introduced remote explosives. Since these little bombs don’t actually do much damage to players directly anyway, there’s no point weighing them against other equipment using the same metrics. Instead you should try to keep some on you when possible as their ability to destroy structures and set devious traps gives you a wealth of opportunities. A particularly useful trick is to use them to destroy the base of an enemy who has built a high tower to hide in, as this will cause the entire structure to collapse and the fall alone should do considerable damage, if not just kill them outright.
Building 101
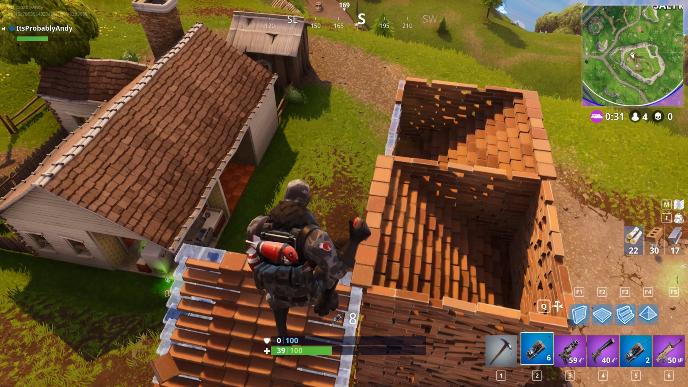
Fortnite’s most defining characteristic is that you can shape your environment to better serve your needs, turning nearby resources like trees and scrap metal into structures like defensive walls to protect you from incoming fire or sloped ramps that let you bypass obstacles and get the drop on your enemies. If you’re just starting out, however, these tools often fall by the wayside as you panic and rush to deal with your attackers, who probably already know how to build circles around you. After a few games it will become obvious that players who know how to build will often come out on top. It’s a tricky concept for any new players to wrap their heads around, so don’t feel too bad if you don’t pick it up immediately, but there are a few things you can try to incorporate into your habits if you want to train yourself to build like a pro.
First let’s cover the basics. There are three material types that you can craft with: wood, bricks and metal. Each property can be found within the world in a number of different forms, like wood as trees or wooden structures, so you should always try to harvest these materials as you travel. Some people like to gather a specific amount before setting off to fight, and you’ll often hear people saying you should have at least 200-300 of each type before the circle starts to get small. It costs 10 units of a material to build each of the four structures, so the cost to make a ramp is the same as a straight vertical wall. The maximum health each material offers is different, however, as seen below:
Wood structures: 200HP Brick structures: 300HP Metal structures: 400HP
So when building something you need to be durable like a tower, it’s worthwhile remembering that building your lower panels with something less sturdy like wood could make it much easier for enemies to bring the whole thing crashing down, especially if they get close with a shotgun or some explosives.
If you’ve already played a few matches you may have noticed that a lot of people will start to throw down walls almost immediately after getting shot at. Typically these snapshot structures tend to be in the shape of a cube, covering all four sides and giving the person inside a brief respite to figure out how to act next. If you’ve got the materials, you should always try to place down some cover for yourself when getting shot at, although it doesn’t always have to be a cube. If you already know which direction you’re being shot at from, you can instead try placing multiple buildings in a line as you backpedal, which will create a much tougher barrier to help stop incoming fire. This could be a series of walls, but I tend to prefer alternating between a wall and a ramp so that you give yourself a way to peak over and return fire if you’re able.
Being the last person standing
With the basics under your belt and a few dozen matches to your name, it’s time to start thinking about how to make it to the finish line and be the last person standing. The idea of somehow beating 99 other people might seem daunting, but you’ll soon find it’s much easier than you think so long as you’re aware of some of the more nuanced factors that can make or break a winning round.
Perhaps one of the most overlooked mistakes most new players make is how they travel long distances across the map. You can’t always get lucky with the circle placement and there will be times where you have to trek long distances to stay in the fray. The problem is that there’s a lot of open land between the pockets of buildings scattered across the world, and stepping out into wide open spaces almost always puts you at a disadvantage, leaving you open to an attack from all sides. To avoid this, try sticking close to the mountain edges that are dotted around the map, or if that’s not an option, use the nearby terrain to block off a direction to give yourself even a slight bit of cover. Many people are tempted to sprint across large open fields like this, but the game actually produces a very noticeable dusy trail behind your character when you do this, and anyone watching out for easy pick offs will easily see this, so try to avoid sprinting unless you’re already being shot at.
When you do finally manage to get comfortable in the circle, it’s time to start thinking about how you’re going to beat those last few enemies. It’s in these close quarter skirmishes that you can really start to flex your improvisational skills and get clever with the tools at your disposal. One of the best things you can find in Fortnite is a trap, which can be placed onto any building surface to act as a deadly proximity-triggered hazard for anyone foolish enough to walk into it. With a bit of creativity this trap can be used to turn the tides when you’re at a disadvantage. A good example of this is to try and place the trap around corners or inside obscured buildings, only to then lure your enemies into your kill field. Mastering these impromptu traps will take some time, but they can be a great way to get the drop on someone much better armed that you.
During the last few minutes inside the safe zone, you might notice that a lot of players tend to sit on top of their own towering structures. The reasoning behind this is that it’s much easier to see what’s going on when you have the height advantage, and since Fortnite allows you to easily build and modify your surroundings, it’s important that you learn to be mindful of threats from above. In this situation you could either choose to start building your own tower, providing you’ve got enough materials and a decent long range weapon to take advantage of it, or alternatively you could attempt to wait out your enemy. Given then it’s very unlikely they have managed to predict the exact point where the circle will contract, odds are they’re going to have to move eventually. These stalemates often boil down to a war of attrition, and keeping a cool head and holding your nerve is usually the key to coming out on top.
Andy Moore is a gaming freelancer based in the UK. When he’s not writing, he can be found staring blankly out of the nearest window, or spending way too much time on Twitter.