Much like its predecessor, The Legend of Zelda: Tears of the Kingdom’s world is both incredibly large and unfathomably dense given. With the playable map effectively more than doubling in size since Breath of the Wild with the introduction of the depths, sky islands, and numerous surface caves, there’s a good chance many players might miss some of the really cool locations which are tucked away in one corner or another. But that’s what we’re here for, to guide you to some of the coolest places you might not have been to.
Yiga Clan Hideout
(-3694, -1368, 0331) (Gerudo Mountain Region)
If you remember the stealthy infiltration mission from Breath of the Wild’s Vah Naboris quest line, then you’ll know where this is, though Tears of the Kingdom has a decidedly different take on the location. For easiest access, start at Kudanisar Shrine in the north/central Gerudo Desert, the one surrounded by constructs and sand flowing southward. Glide north from the shrine, past the source of the flowing sand, and into the canyon up ahead. You’ll know you’re on the right track if you see a half-finished stone slab car leaning against a rock. Obviously the game is very subtly suggesting you should finish the car and take it with you as you go further into the canyon, though for maximum style points, we recommend you attach rockets to the car as well regardless of practicality. Keep going into the canyon and eventually you’ll find a door with the entrance to the hideout. The door won’t open for you unless you’ve found the full Yiga armor set, but if you do have it, you’ll be welcomed inside as part of the gang and get access to tons of goodies, including purchasable eightfold blades and duplex bows, the storm-proof lightning helm, and the badass (if not always particularly practical) earthwake scroll. Frankly, it’s really cool to see something like this in a Zelda game, infiltrating an enemy faction peacefully and getting to take advantage of all of their stuff. And it goes to show how thoroughly Nintendo recontextualized the game’s map that an area once reserved for a stealth section is now a permanent settlement of its own.
Great Abandoned Central Mine
(-0821, -1940, -0523) (Central Hyrule Depths)
The depths are home to a bunch of abandoned mines, but none quite as big or quite as cool as this, as evidenced by the fact that it gets its own fast travel point. To get here, I’d recommend starting on the surface rather than in the depths, as this will provide an easy point of reference, especially if you’ve played Breath of the Wild. The mine can be found directly beneath that game’s starting area, the Great Plateau. In a cool nod, the Great Plateau of this game has four chasms into the depths, each one located in the same spot as one of the four tutorial shrines in Breath of the Wild. Take one of these chasms down and proceed to the center of the plateau, with some of the chasms dropping you near minecart rails you can ride along on the way. I’d also recommend activating the nearby Koradat Lightroot, on an elevated cliff towards the south side of the inverse plateau, so that it’s easier to make out your surroundings. You’ll definitely know the mine in question when you see it: it’s a huge white building with some constructs and some shady-seeming researchers. Be on your guard while in the area: this mine features a very cool power you can’t find anywhere else, but also a fairly challenging fight. I’ll let you discover for yourself what exactly each of those entail.
Yiga Blademaster Station
(-2428, -1822, 0147) (Gerudo Canyon)
Well, what do you know, the Yiga Clan shows up again. You can hardly blame us though; these lovably goofy villains have been made into one of the best parts of Tears of the Kingdom, with their cool depths fortresses and their ability to make ultrahand contraptions just like yours. But have you ever dreamt of joining the ranks of their commanders, the blademasters? Well those dreams can be a reality if you make your way to this very tucked-away spot. The entrance is very easy to miss, so I’d recommend you start from the Gerudo Canyon skyview tower. Don’t shoot yourself out of the top; you’ll have more than enough height from the mountain the tower stands on. Look to the north towards the waterfall and glide towards it. Don’t do this wearing Zora armor, because you’ll want to glide through the waterfall, not up it. Behind the waterfall, you should see a narrow cavern carved out of the cliffside. Look around in here and you’ll find a small wooden door guarded by two frog statues. Enter the door wearing the full Yiga outfit and you’ll be sent on your quest to become one of Master Kohga’s best.
The Giant Horse
(0800, -3719, 0080) (Faron Grassland)
While Tears of the Kingdom does let you keep all of your unique steeds from Breath of the Wild, more horses can never hurt, and Tears of the Kingdom introduces a second giant horse, a lovable but temperamental big guy great for running over enemies and small woodland creatures across Hyrule. The new giant horse can be found in an area that Breath of the Wild players will remember as the location of the Horse God, the mystical fairy-like deity who could revive your fallen horses. But the Horse God has since found new stomping grounds in Akkala, leaving the little ravine in which he once resided vacant but for the new giant horse. To get there, start at the Highland Stable in Faron Grassland and follow the road southward, preferably on a horse for thematic consistency. When the path splits in the canyon, go east (your left) and follow the road until it ends. Here you’ll find a lovely little lake enshrining the legendary giant horse itself. Careful, though; don’t try to tame it unless you’ve got a lot of stamina or at least some stamina-restoring mid-rodeo snacks. The big guy won’t make taming him easy. It’s worth it, though, to befriend this majestic creature.
Cephla Lake Cave
(2595, 1327, 0152) (Eldin)
This particular cave is a real treat for fans of dogs and cool armor sets. Finding it is very simple: start at Kisinona Shrine, the one right near Eldin’s Foothill Stable, and instead of gliding south to the stable, glide down north. You should see a big cave entrance with two guys standing outside arguing. These are the brothers Prissen and Domidak, treasure hunters on the trail of the armor left behind by the legendary bandit Misko. Misko was known for leaving behind riddles to hide his treasures, and this case is no different. The trick is, Cephla Lake Cave is filled with tons of dummy chests, but only one real one containing the treasure, and the way to find out which is super clever. Those with close attention to detail may already know that, if you befriend a dog by feeding it meat or fruit, it’ll sniff out hidden treasure for you—and wouldn’t you know it, there’s a dog right outside. I really like this quest in particular because, as cute as the dogs are, their treasure-sniffing abilities have unfortunately never really been made all that useful—for proof of this, that mechanic was actually already in Breath of the Wild, and I don’t think most players ever used it or even knew it was there. This quest is cool because you actually have a chance to spend some time with Hylian’s best friend and go on a short adventure together. Though the real adventure might just come after you find the treasure, because as it turns out, Misko’s got even more tricks up his sleeve.
Floating Coliseum
(-1135, -1196, -0499) (Central Hyrule Depths)
Be forewarned: this recommendation is only for those looking for a serious challenge. The depths are home to many coliseums, where you’re locked inside a giant arena and forced to battle several waves of enemies for a reward if you want to escape. But this is not just any coliseum, this is the king of all coliseums, home to an incredibly daunting battle: five gloom-fueled Lynels in a row. If you hear that and think that’s a cool challenge rather than being terrified, then by all means, go for it. To get there easiest, start by activating the Nogukoyk Lightroot, which you can find right next to the Great Plateau North Chasm. This should reveal enough of the map that you can see where you’re going (if not, try getting the Nihcayam Lightroot to the north as well). The coliseum you’re looking for is directly underneath the surface’s Coliseum Ruins. If you look at the map, you’ll see that there’s a thin stretch of land on the east side of a moat around the coliseum. Just follow along with that and you’ll easily make your way to the coliseum entrance—but rest assured, getting there is the only easy part.
Shrine of Resurrection
(-1065, -1832, 0142) (Central Hyrule)
This one will definitely be familiar to fans of Breath of the Wild, as it’s the spot where that game’s iconic beginning takes place. Unfortunately, it’s seen better days by now, with some run-down cave growths and some unwelcome visitors. Regardless, you’ll probably want to check it out anyway. You can get there pretty easily from either the north or the south. From the north, start at Kyokugon Shrine on the Great Plateau and ascend upward out of the cave. From there, look for a ruined cathedral to the south. Go there, maybe pay respects at the statue inside, and then cross the pond to the west to find a crumbling stone path built into a slope. Follow it up and you’re there. From the south, you can ascend out of the cave where you find Tadarok Shrine, then glide directly north across the River of the Dead, going for the grassy ridge on the other side of the river. Keep walking north from there and drop off the ridge, then turn around and you’ll see the entrance to the cave you’re looking for. One more thing: while you’re in the cave, be mindful of your surroundings. The path forward may not be obvious—remember cave holes can be vertical too.
Mushroom Haven
(-4054, 2577, -0007) (Hebra)
Who doesn’t love mushrooms? If you’re a particularly big mushroom fan, then this tucked-away little spot is for you. To find your way, start at the Rospro Pass Skyview Tower in Hebra. Climb up the mountain just to the north or shoot yourself out of the tower, whichever is more your style, and glide down to the north across the river towards the Sturnida Secret Hot Spring, which should look like a small body of water in a lighter shade of blue on your map. Follow the source of the hot spring upstream until you find Sturnida Springs Cave. Keep pushing deeper into the cave to find a breakable rock wall. Break it, and continue further until you reach a room with two more breakable rock walls. Once you’re here, turn back around towards where you came in from—you should see a crawl space blocked by a movable rock. Ultrahand the rock out of the way and crawl towards your fungal destiny. While this may not be the flashiest sight in Hyrule, it’s definitely one of the most unique and is just kinda a nice place to stop and vibe for a bit. Plus, if Hateno Village’s resident fashionista Cece has taught us anything, it’s that mushrooms are very chic.
Eventide Island
(4510, -3500, 0001) (Necluda Sea)
Looking for a good fight that’s maybe not quite so daunting as five Lynels in a row? Eventide Island might be for you, home to a bunch of big enemy camps for you to take out. As a fairly remote island all the way out in the southeast corner of the map, getting there is a bit of a process. Start at Lurelin Village, preferably after you’ve liberated them from their pirate captors, and then head southwest following the hook-shaped peninsula Cape Cresia. You’ll recognize it by the scimitar geoglyph etched onto it. Follow the peninsula all the way and you’ll reach Soka point, currently occupied by a Boss Bokoblin and its minions. Take them out and then use either the devices you’ll find on the beach or some of your own to make a boat, and then just sail east out to the island. Once you get there, ignore the shrine radar. Trust me, you can’t get to the shrine until you take out the enemy camps first. If the beeping is driving you insane, just turn it off or let it focus on something else for a bit. Instead of following the radar, search the beach on the west side of the island for a tent and cooking pot, where you’ll find Sesami, who’ll give you the quest to take out all the island’s enemy camps. Personally, I thought these were some of the more fun camps in the game, with cool architecture that lets you go wild with your destructive creativity.
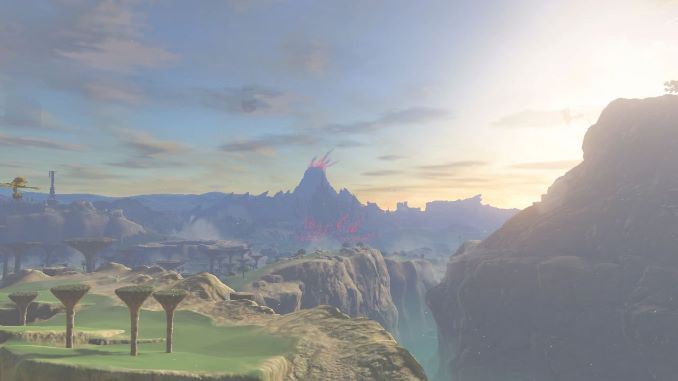
Washa’s Bluff
(-2773, -0222, 0242) (Hyrule Ridge)
I’ll end off this list of recommendations with one of life’s simplest yet truest pleasures: a nice view from a high place. To preface, though, I would recommend waiting to stop by until you’ve completed all of the quests for the Lucky Clover Gazette—you’ll get the nice view either way, but if you wait until then, you might just happen by a friend in the area. Whenever you decide to go, though, to get there, start at Tabantha Bridge Stable and ride out following the road eastward. Keep an eye out to the south until you see a stone enemy fort at the foot of a long plateau. Climb up behind the fort, maybe after having some fun with the Bokoblins messing around inside, and follow the green part of the ridge south. You’ll know you’re going the right way if you see a small tent with a traveler fighting a Bokoblin nearby. Just past that tent is an outcropping of mushroom-shaped rock formations: your destination is the top of the tallest one, the one with a tiny wooden hut on top of it. Ascend to the top of one of the shorter ones, and then use that as a platform to ascend to the top of the big one. And here you are, basking in the beauty of a full 360-degree view of Hyrule’s beauty. Feel free to let it soak in.
Hope Pisoni is a Paste intern.