The sequel to 2016’s Hitman reboot is here, and with it are a heap of new challenges for would-be assassins to power through. While most of these challenges offer some instruction on how to complete them, there are a handful that reveal nothing more than a title and a picture to guide you towards their hidden goals. Thankfully we’ve nailed down the particulars to completing each and every redacted challenge in Hitman 2, just in case you want a few pointers when solving these mysterious activities.
Before starting any of the challenges below, it’s worth noting that many of the scenarios listed here will require the use of the lockpick tool as well as the coins, as there are often locked doors and awkward patrols barring entry to vital areas required to complete the challenge itself. For that reason, it’s important to make sure that you start each level with the lockpick and coins, otherwise you may find it difficult, if not impossible, to finish the objectives involved.
Deja Due – Miami
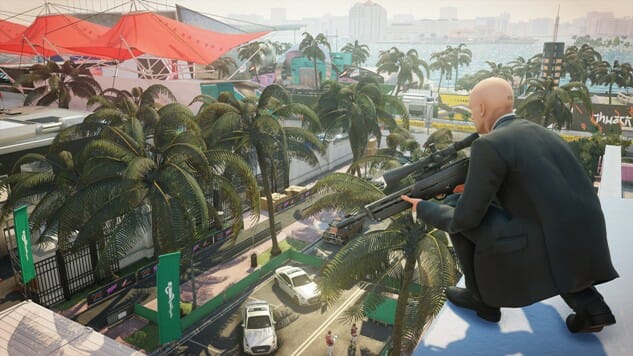
For this challenge, you will need to start the level with a sniper rifle. Starting from the Marina will save you a walk, but regardless of your entry point, you should begin by heading over to the eastern external wall of the exhibition center and stand in the pathway between the food stalls and the grassy area where a couple of people are exercising. Look up towards the top of the exhibition center and locate the single pigeon sitting inside one of the alcoves of the building. Unpack your sniper rifle and shoot the pigeon to complete this challenge.
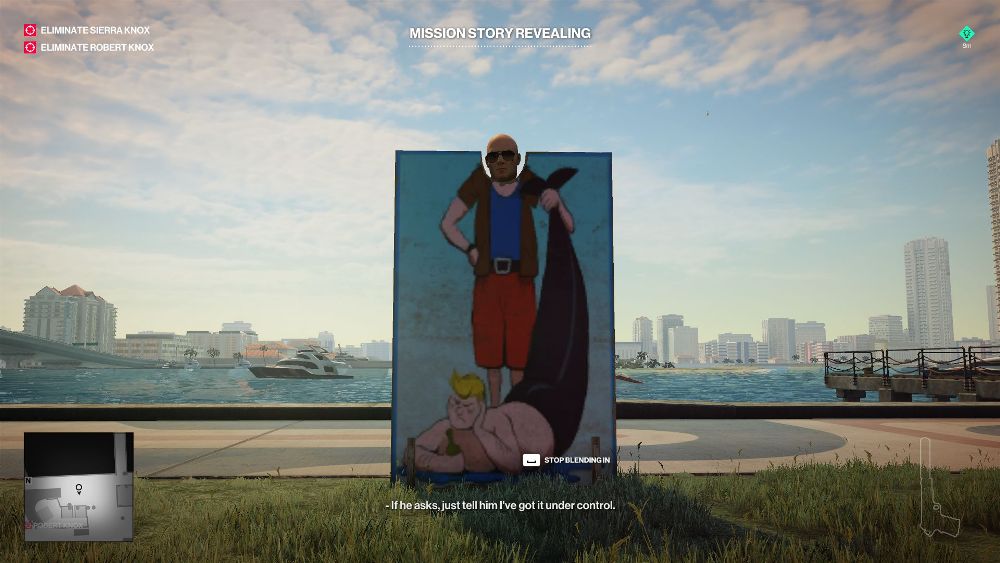
One of the easier challenges, Tintamarresque requires you to blend in with the wooden photo frame cutout found opposite to the hot dog stands near the Marina on the eastern edge of the map. Simply interact with the stand and take in 47’s lighthearted side to complete the challenge.
Explosive Liaisons – Miami
To complete this challenge you must make Robert Knox mistakenly blow up his own daughter. Starting at the main entrance, take the locked entrance to the right and sneak past the workers inside until you make it to the window leading into the security locker room. Sneak inside, then go through the hallway into the CCTV room to grab the safe combination on the desk. Leave the room via the other door and head into the room with the safe to grab the car bomb and documentation held within, climbing out of the nearby window when you’re done.
Once outside, head down the main strip and proceed towards the Kronstadt pit stop area, sneaking inside and using the nearby generator to grab a Kronstadt mechanic uniform. When you’re properly dressed, trigger the pit stop for Sierra and plant the car bomb onto her vehicle. After the cutscene ends, grab the keycard on the other side of the pit stop area, and then head outside and down the stairs towards the lockers underground. Grab the Kowoon mechanic outfit, then make your way back to the pay phone at the main entrance of the map. Call Robert Knox and arrange a meeting, then head through the underpass and take a right after exiting on the other side. From here you should lockpick the locked gate on the right and head up the stairs leading to a catwalk above the finish line where Robert Knox will eventually meet you. Simply hand over the detonator and allow Robert to carry out his scheme in order to unlock this challenge.
Shafted – Miami
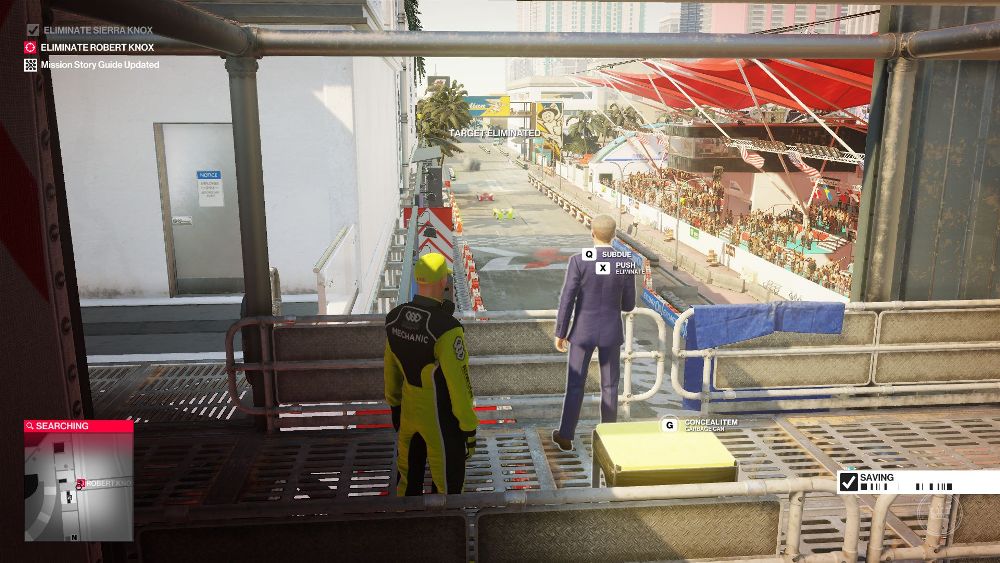
Shafted requires a lot of setup to make happen. The goal with this one is to kill Robert Knox by throwing him down the broken elevator shaft. To do that, you’re going to have to make use of the car bomb opportunity, tricking Robert into meeting you face to face near the top of the shaft in the process.
To start this, begin at the event entrance and make your way through the area behind the locked door to the right, eventually sneaking past the workers inside and climbing through the window into the locker room of the security office. Sneak into the CCTV room and grab the safe combination, before heading out of the other door leading towards the room with the safe. Grab the car bomb and the documents in the safe, then climb out the window and head over to the Kowoon pit stop area. From here you want to sneak inside, sticking to the area on the right with the generator in it. Use the generator to lure the Kowoon engineer away, knocking him out and taking his costume before starting the pit stop sequence and placing the car bomb on Moses Lee’s car.
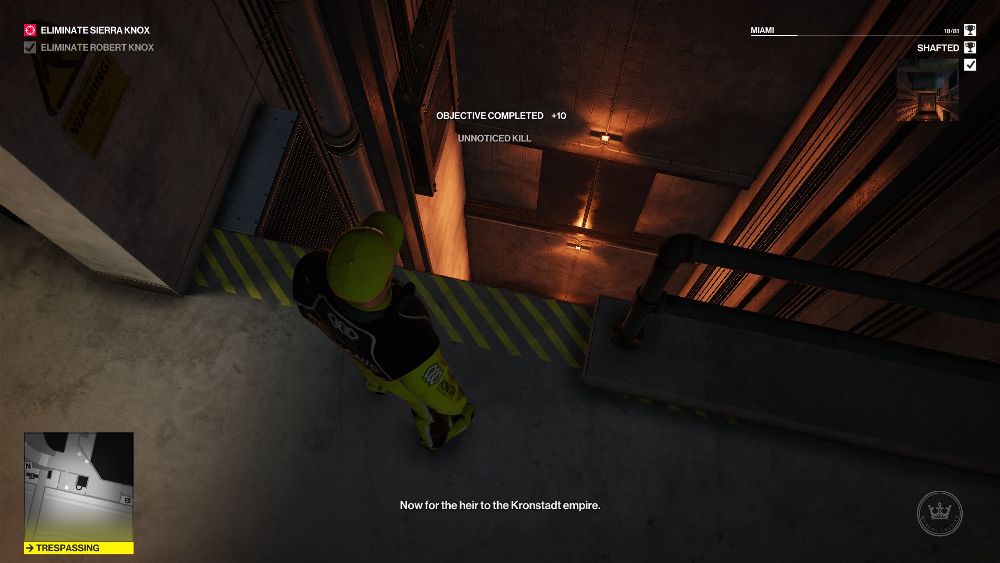
Once these steps have been done, head back to the main entrance making sure to avoid any enforcers on the way. Use the pay phone next to the underpass to arrange a meeting with Robert, then head through the underpass and take a right at the top of the steps. Proceed to the chain link fence on the right and lockpick the gate open, which grants you access to the catwalk up the stairs where Robert will meet you. Give him the detonator and wait for him to dismiss his guard before knocking him out. Head through the door the guard went through and knock him out too, and then simply drag Robert into this room and dump his unconscious body down the shaft in order to complete the challenge.
To complete Hot Shot you are going to have to spend a lot of time waiting for things to happen. Not only does it require the race to be over, which can be sped up quite easily, but it also requires Sierra to win and go through her post-victory routine before eventually ending up in the upstairs bar.
To start this challenge, begin at the main entrance and head over to race marshal’s booth which can be found next to the finish line on the eastern side of the track. Take out and hide both of the marshals, disguising yourself as one of them before disqualifying Moses Lee using the flag in the booth at the top of the stairs. Once you’ve ended the race, head inside the garage next to the marshals area and grab the rat poison on the right near the base of the stairs, as well as the octane booster found on the upper level in the corner. Head back outside and go south, travelling through the podium tunnel underpass before vaulting the wall leading to the area behind the Kronstadt Paddock. Grab the waiter disguise then head back to the outer area behind the paddock, walking west across the path and up the stairs leading to the media suite and driver’s lounge. Take care up here as there are a lot of enforcers patrolling the hallways on the upper level. Make your way over to the driver’s lounge and use the octane booster on the chili bottle before heading downstairs.
The next step is to acquire the Moses Lee outfit, which should be easy now that the race has ended. Lee can be found on the upper level of the Kowoon Paddock patrolling around the area near his beer. Head to the upper level and use the rat poison to spike his drink, then wait for him to go into a quiet area and take him out to get his clothes. Once you’re disguised as Lee, head back towards the podium underpass and take a left at the top of the stairs towards the interview area. Sierra should be around here by now as she takes photos and gives interviews about her victory. Wait around in the area until she’s finished, after which she will come over and talk to you, suggesting you go do some shots. Once you’ve heard that prompt, head back to the driver’s lounge and wait for Sierra to eventually turn up. From here you’ll have to participate in the drinking game, making sure that Sierra is the one that gets the octane boosted chili shot. Once she lights the drink, the challenge should then complete.
Mr. Tambourine Man – Miami
To complete Mr. Tambourine Man you will need to dispatch an innocent musician and assume his role. Starting at the main entrance, head down into the nearby underpass connecting the dolphin plaza and the main entrance. From here, you’ll want to wait until the coast is clear, then take out the musician down here, taking his costume in the process before interacting with his instruments. The challenge will complete once 47 starts to compose his own little song.
Last Words – Miami
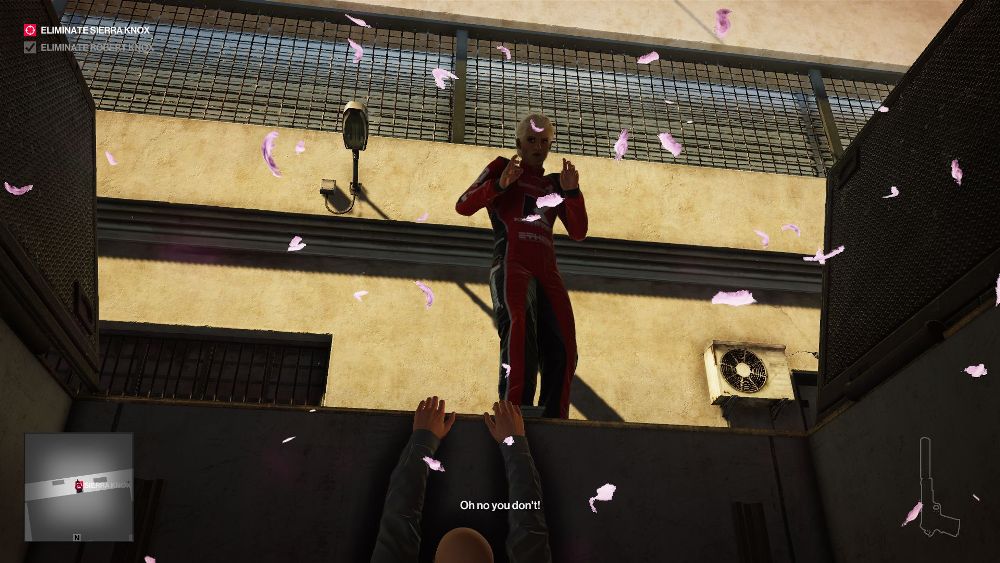
To complete this challenge you have to die, and while that’s somewhat unorthodox, the actual steps involved are fairly straight forward. To do this head into the underground garage and give the dropped keys to the mascot blackmailer. Once he goes to get his documents, head south to the podium underpass and make your way to the western edge of the old hotel in the corner, avoiding the medical staff hanging around the area. Wrap around the back of the hotel into the alleyway where the van is and wait for the blackmailer and Sierra to meet. This may take some time if Sierra is still racing so you can speed that up by sneaking into the race marshal tower and disqualifying Moses Lee. Climb into the open pit in the alleyway and simply wait. Sierra and the mascot will eventually arrive in the alleyway and begin arguing, which ends with Sierra pushing the mascot down the chute. She will then notice 47 hanging there and stamp on his fingers, sending 47 down the hole too and finishing the challenge.
Sweet Victory – Miami
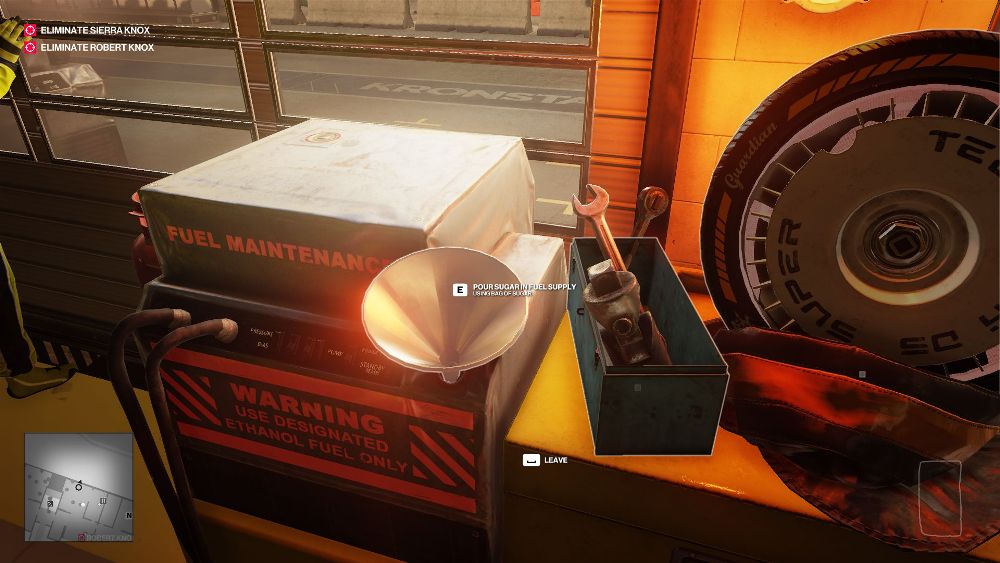
To do this challenge you need to pour sugar into Moses Lee’s engine during a pit stop. Start by either selecting the Driver’s Lounge starting zone, or by acquiring a waiter’s outfit from the back area of the Kronstadt Paddock. Head behind the bar in the driver’s lounge and grab the bag of sugar before heading down the nearby flight of stairs. Go all the way to the basement and head into the locker room to grab the Kowoon outfit and the keycard, then head up into the Kowoon mechanic pit. Simply pour the sugar into the engine, which will trigger a pit stop and complete the challenge.
You Got A Fast Car – Miami
For this challenge you will have to tinker with Robert Knox’s precious prototype model car, modifying it into something a little more explosive in the process. Starting at the main entrance, head through the nearby underpass and go down the ramp leading to the underground parking area. Take the door at the bottom of the ramp on the right, grabbing the screwdriver near the doorway before heading back outside and up the ramp towards the exit. From here, head through the main entrance of the exhibition center, taking a left once inside towards the cloak room. Vault over the ledge and grab the engineer outfit inside, then head towards the showroom area where Robert Knox has his prototype vehicle on display. Take the entrance to the right of the car and head into the garage area to find the octane booster in the corner above the stairs. Once you’ve grabbed the booster, head back into the showroom and use the screwdriver to sabotage the engine at the back of the car, then use the octane booster afterwards.
Once this is done, a nearby engineer will inspect the car and call Robert Knox downstairs to come fix it. Stay nearby while this is happening, as Robert will instruct you to climb into the car once he starts working on it. Once you climb into the driver’s seat, the challenge should unlock, but if you wanted to get a second challenge done while you’re there, stay inside the seat and wait for Robert’s third attempt to become explosive.
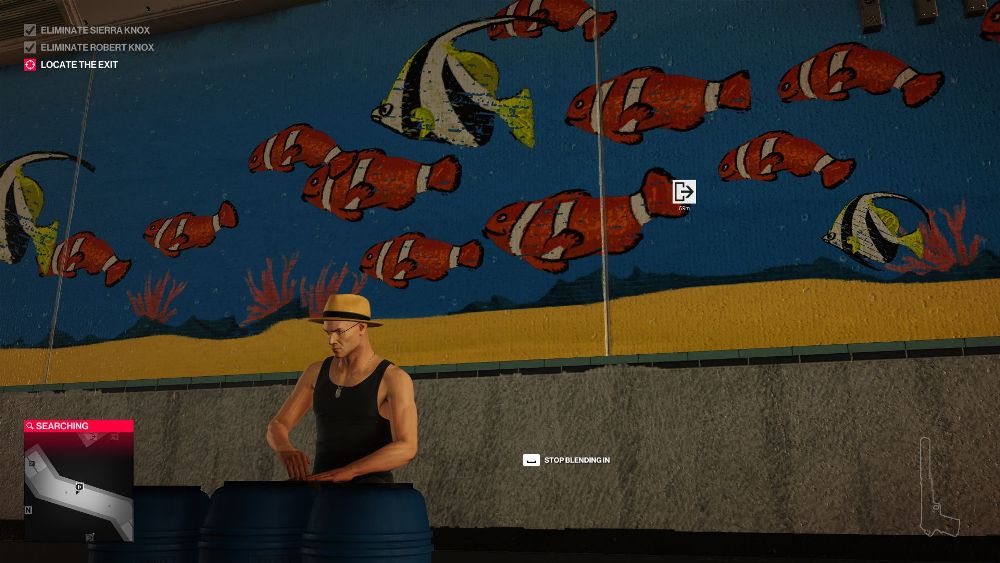
Tanked – Miami
For this challenge you’re going to have to sacrifice a few fish in the process. Starting at the main entrance, head inside the main entrance of the exhibition center and climb into the cloak room to get the engineer’s outfit. Once you’re suited up, proceed to the restricted aquarium area and slip inside. From here, all you have to do is wait until the two guards inside patrol towards tank number 11. Once they’re stood in place, shoot the tank and watch as the water takes both guards out, completing the challenge in the process.
Secret Tunnel – Santa Fortuna
This challenge requires you to complete some very specific steps in order to see it through to the end, but thankfully they aren’t particularly difficult. Starting at the default entry point in the village, head south out of the village and cut through the trees to find the shaman’s hut. Grab his disguise and the poisonous flower in the corner then head back into town and down the hill towards the bar. From here you need to spike the drink on the table in the corner of the outside seating area of the bar with the flower, so try and create a distraction with a coin beforehand to avoid alerting nearby patrons. Wait until the guy drinks the beer then rushes to the bathroom, following him as he goes and knocking him out to get his key. Once you’ve got the key head back up the hill toward the town and go towards the first house on the right. The key will unlock the door, and you should find a golden idol on the desk inside. It’s worth noting that breaking the door or using a lockpick will cause the idol to disappear so make sure you get the key first.
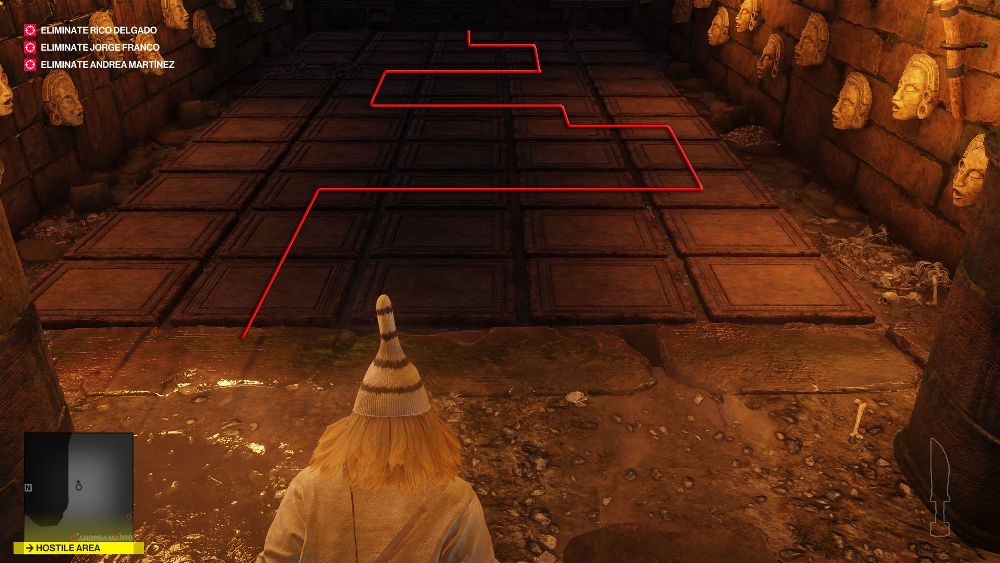
With the idol in hand, head back down the ramp and go past the bar towards the parked bus. Hug the cliff side on the right and it should lead you to a waterfall with a log tethered to the other side of the river. Shoot the rope and use the log to cross the stream. After getting across the river, head right and follow the cliff face and vegetation until you reach the ancient temple. Place the idol into the impression on the wall to the left, taking care not to attract the attention of the two nearby guards. Proceed down the stairs and follow the path drawn out in the image to make it across the traps, and once you’ve grabbed the knife on the altar at the end, you will complete the challenge.
Rude Awakening – Isle of Sgail
The aim of this challenge is to get up from the open casket wake during the ceremony. Enter from the docks and work your way up through the underground chambers via the tunnel on the cliffside that you can access by climbing through the guardhouse window. From here, make your way up through the levels, acquiring a guard’s outfit first, and then ultimately grabbing a custodian outfit. Head over into the warehouse near the loading bay and smash open the crates to get the burial dagger, then proceed towards the area where the wake is.
Take the grassy path just to the left of the wake area and cross over to the foot of the tower where they are preparing Janus for his wake. Lockpick the door and head inside, taking care of the three guards and the mortician in the process by using the fuse box and boiler button to lure them away. Once you’re dressed in the burial robe, head back outside and follow the path behind the wake which lets you climb up on top. Signal the harpist to start playing then climb onto the altar. After the ceremony starts, you’ll be given a prompt to get up, which you should do once Zoe starts giving her speech, surprising the guests and completing the challenge in the process.
Switcheroo – Isle of Sgail
As the name suggests, the Switcheroo challenge requires you to try your hand at being a jewel thief, swapping out the level’s coveted Cloud Serpent necklace for a humble apricot. The important thing to know about this is that the security system has to come back online after the swap has taken place, so you can’t break the glass or disable the security on the terminal overlooking the display case.
To start this challenge, either begin as a chef in the kitchen or at the main entrance. Either way, you’ll need to find your way into the kitchen to grab one of the two apricots on the plate near the cleaning kitchen staff member. Once you’ve grabbed the fruit, the next step is to acquire a custodian outfit, which can be easily obtained from the warehouse area. After you’ve got your custodian threads, you can now freely travel across the areas you’ll need to access to complete the challenge. Head into the large gallery hall that contains the display case and locate the fire alarm which can be found in the corner of the room. There are two rooms flanking the fire alarm, both containing staircases that lead upstairs. Disregard the room with the shrine to Janus and instead focus on the other room that has a bathroom, a room with two custodians examining artifacts, and an entrance leading out towards the warehouse building. Inside this room there is another exit that isn’t guarded, but the door is locked. Next to the door is a fuse box that, when disabled, temporarily shuts down the security system to the display case.
To complete this challenge, wait by the fire alarm until the Constant enters the room before pulling the alarm and forcing everyone to evacuate the hall. If you do this without the Constant in the room, two guards will remain inside and you will have difficulty doing the swap. Once you’ve pulled the alarm, run into the room mentioned earlier and disable the fuse box, then head back to the display case. If all has gone to plan, you should now have about 40 seconds to grab the necklace from the pillow and make the swap. Once you’ve pocketed the necklace, equip the apricot and a prompt will appear letting you place the fruit into the center of stand. Head back to the fuse box and reactivate it, which will then complete the challenge.
Andy Moore is a gaming freelancer based in the UK. When he’s not writing, he can be found staring blankly out of the nearest window, or spending way too much time on Twitter.