Metroid Dread’s jam-packed with some of the year’s best (and most challenging) boss fights. Classic Metroid fans and newcomers alike are sure to run into more than a few challenges while trying to take on some of the game’s action-heavy bosses, so we decided to go through and break down what makes each one tick.
Also, for the sake of efficiency, nearly every boss in the game can only be damaged by Samus’ missiles. So, unless we let you know otherwise, be sure to come to every encounter with as many missiles as possible! Many can be hurt by the charge beam, but it’s much easier and faster to use missiles. And, of course, beware of spoilers for Metroid Dread in this guide.
Corpius
If you’ve spent any time on social media in the lead-up to the release of Metroid Dread, you’ve probably seen a few clips from this fight. Although not a pushover, Corpius is a relatively simple fight—in his first phase, he has only three attacks. When he holds his tail up, be ready to use your slide to get out of the way. If he starts holding his tail backwards, he’s going to swipe at Samus on the ground, so a well-timed jump will keep you safe. In his third attack, he spits small balls of poison at you. Shoot these to restore some of your missiles or health.
Once you deal enough damage to his face, he’ll turn invisible—or at least mostly invisible; he’ll have a glowing spot near the tip of his tail. Shoot it as much as possible while avoiding his attacks, which are telegraphed by the glowing part of his tail. Thankfully, since he’s so hard to hit, you can just use your normal power beam to shoot his tail.
After you pump Corpius as full of missiles as you can, a brief cutscene will play, where he’ll show you his underbelly. Once a gap opens up, slide underneath him and be ready to use your melee counter, since he’ll try to stab you with his tail as you slide. Once on the other side, he has most of the same attacks, but he also has an attack where he covers the ground in poison gas.
To avoid this, grab onto the Spider Magnet Strip on the wall and unload some bullets while he’s attacking. You’ll be able to tell when he’s going to do this attack when he holds the poison in his mouth longer than when he shoots it directly at Samus. You’ll be able to slide underneath him again after dealing enough damage, triggering another opportunity for you to counter. Land the counter to win the fight and get the phantom cloak.
Kraid
A foe as old as the franchise itself, Kraid’s back with a vengeance. In his first phase, he’s still chained up, so he’s really only able to shoot different types of projectiles at you—when he looks up and opens his mouth, he’ll start dropping small orbs on you with the occasional ball of fire thrown in for good measure. Shoot the orbs to regain missiles or health, but watch out for the fireballs, as you can’t destroy them. He throws wishbone-shaped projectiles at Samus. They’re also destructible, but they’re a bit harder to hit and avoid. Avoiding these projectiles will keep you alive, but you won’t actually damage him unless you hit him in the mouth with missiles. Shoot him in the face and he’ll briefly open up—but be careful, as the attacks won’t stop.
After enough missiles, a brief cutscene will play and the real boss fight begins. Now, he shoots some projectiles from the infected-looking hole on his belly. You can shoot the ones that bounce to restore missiles or health. He also shoots small clouds of poison, which will always land in the middle of the platform you’re on. It’ll send shockwaves in each direction after it lands, so make sure to jump to avoid any unnecessary damage. While avoiding these projectiles, shoot the hole in his belly that they’re coming from.
Soon, small, spiked projectiles will briefly emerge from his belly before shooting into the wall behind you. If all three appear at the same time, go into the morph ball or slide underneath them. If he shoots one at a time, quickly jump from platform to platform. If you get on top of the third one, jump onto the spider magnet strip. Or if you deal enough damage, the magnet strip will come down by where Samus is. Regardless, when it’s in reach, grab on and shoot as many missiles as you can while avoiding Kraid’s projectiles as destroying them when you can.
Deal enough damage and Kraid will attack you head-on. Be ready to counter his attack. Once you land the counter, mash the missile button to defeat Kraid.
This is also where the game’s first sequence break shows up—if you’ve purposefully or accidentally broken the game through some intense platforming acrobatics, you might have the morph bomb. Use it on the lower-left corner of the small platform you’re on to reveal a hidden morph ball launcher. Use it to trigger a special reward for sequence breaking the game.
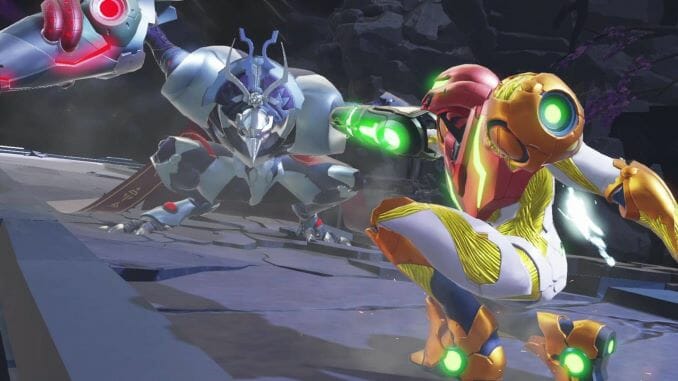
Robot Chozo Soldier
Samus is out for revenge after the Robot Chozo kills Quiet Robe. Needless to say, this miniboss is giving players a run for their money. Be sure to pay attention to this fight, because you’ll run into this enemy a few times throughout Metroid Dread. All of the stages where you fight these guys are nearly identical, too, so learning to take advantage of the arena will be invaluable.
Their attacks are certainly the most choreographed. With four main attacks to speak of and no changing phases, the challenge with these enemies is telling how close they are to defeat. In their deadliest attack, they wind up one of their arms, which starts glowing a bright red. Jump over and use your flash shift to dash past the mechanical menace to avoid getting hit. Jump and dodge early, though—the attack has a lot of verticality. The Robot Chozos glow blue before their other melee attack, which you can counter. Watch out for the white flash and be ready to counter before they hit you.
The Robot Chozos also have two different types of ranged attacks. In one of them, they shoot three projectiles at you. If you’re in the air or standing up, slide underneath them to avoid getting shot. If you’re on the ground when they shoot, you should be able to jump over all three, especially if you’re far away from the enemy. Their other projectile is a charged attack. It’s a bit faster than the other projectiles, but there’s only one, making it easier to jump out of the way.
Escue
Escue’s a pleasant return to form for long-time Metroid fans in a few ways. While their first phase features a lot of what makes Dread’s bosses great, it brings a bit of nostalgia for fans of Metroid Fusion.
Escue’s first phase is almost entirely centered around jumping around as many projectiles as possible. One attack is a slow-moving, purple orb. It’s easy to jump around and avoid, but don’t let your guard down just because you’ve dodged it—once it hits the ground, it sends shockwaves along the surface, and you’ll need to jump over them to avoid taking damage. You’re in the clear if it hits the wall, though.
They also will lock on to you, shooting a massive volley of projectiles. The projectiles track you, but won’t follow too far. There should almost always be enough space for you to jump over the volley or slide underneath it.
After dealing enough damage to the boss, it’ll take a dive at you—keep an eye out for the white flash and counter it to trigger a brief cutscene. Like most other boss fight cinematics, unload all your missile tanks into the bugger to get to the second phase of the fight.
The second phase sees the return of the big X Parasite from Metroid Fusion. Each missile will cause the X to hemorrhage the X Parasite, which you can absorb to restore missiles and health. It won’t take you long to take down this floating blob and get the storm missile.
Droygyga
Droygyga might be the game’s most unique boss. Instead of avoiding a flurry of fast attacks or sliding underneath them and shooting them from behind, defeating Droygyga is a matter of patience and understanding environmental cues.
The first of its main two attacks involve it pulling back two tentacles before sweeping them both across the floor. Even though your mobility’s going to be really limited underwater, you should be able to jump out of the way of both attacks. You have just enough time in-between swipes to land and jump again. It also shoots projectiles from the ceiling down. You can destroy the blue ones to get back health or missiles, but not the orange ones.
Keep at this process while occasionally shooting Droygyga’s tentacle at the top of the screen when you can. Keep at it long enough and a green button will appear on the side of the room. Shoot it until it becomes red and grapple beam onto the spider magnet strip, which will then take you to the other side of the map. Shoot the button on the other side of the room until it turns red to drain all the water from the room.
This will cause Droygyga’s shell to open temporarily. Shoot the glowing pink mass in the middle as much as you can. It’ll attack you with one of its tentacles. You can counter this attack to trigger a quick time event where you can deal lots of damage to the boss. Keep this up to defeat it.
Chozo Soldier
These Chozo Soldiers may have fallen to the X Parasite, but they’re no joke—their main attack with the spear is particularly deceptive. After they do a brief circular wind up, they’ll slash forward, holding their position briefly before pulling back. Don’t just watch out for the main part of the attack, because when they pull their spear back, you can still get hit by it.
Before their next attack, they’ll jump up on the wall before slamming down on top of you with their spear. Use your flash shift or your slide to avoid the attack. Other iterations of this miniboss might have shields in their first phase, too. If you encounter an Elite Chozo Soldier, get behind them and shoot them with everything you’ve got. They’re a bit harder since you can’t shoot through their shield and they have a blazing fast dash attack that’s near impossible to counter.
Once you do enough damage, they’ll let out a blood-curdling screech, indicating that the second phase of the fight has begun. Their spear attack doesn’t change too much in this phase; it hits lower to the ground and has a much longer range. Use your dash and space jump to get out of the way. Now when they jump on to the wall, they can do one of three things, one being the same ground pound attack as before.
Their two new attacks both happen after they screech. If it’s a short wail or they jump off the wall, they’re going to slam down in the middle of the room, sending shockwaves in each direction. This move leaves them vulnerable for a bit longer than others, so take advantage of that while you can. If they don’t jump, you shouldn’t either. The next attack is a beam aimed at you, so if you’re in the air, you might get caught. Considering how long this attack lasts for, you should be especially careful.
Experiment No. Z-57
He’s baaaaaaaaack! Well, maybe… Experiment No. Z-57, who looks suspiciously similar to our old friend Corpius, is one of the most complex bosses in the game. By this point, you should have the space jump, which completely changes the structure of pretty much every boss fight from here on out. Get ready for some aerial combat and, since you have a never-ending jump, you can’t touch the walls anymore.
When the experiment shoots a large volley of sludge across the floor of the room, space jump over its head to avoid getting hit. If you can’t get over its head in time, there will also be spots on the floor that aren’t covered in X Parasite residue for you to stand in. Once it starts back up again, jump over its head immediately to avoid getting hit by the boss’s strongest attack.
If it winds up its claws to either side of the room, it’ll swipe downwards diagonally. Use your space jump to avoid each attack by jumping in the side of the room opposite the attack.
When it starts hurling goo from the ceiling down to the floor, crouch near its mouth. If you don’t get hit, you’ll need to pull off one of the hardest counters in the game. Nearly immediately after the attack is done, you’ll have a very small window to counter its next attack. This will trigger a quick time event where you need to shoot a volley of missiles to trigger the second phase of the fight.
You’ll know you’re in the second phase when Experiment No. Z-57 puts its four limbs on different parts of the room. Use your shiny new storm missile to knock its claws off of their perch and keep it from firing a big energy beam.
When it starts shooting the wall with a large energy attack, get ready to run. A volley of projectiles will begin to fly at you. Be sure to jump in-between them as the attack goes on otherwise you’ll get knocked into the wall and take extra damage.
It also has the same attacks as the last phase, but with one major change. During the attack where it slashes each way, it will now attack on both sides, leaving a small gap in the middle of the room near the ceiling. Don’t jump too early, though, because its limbs can still cause damage even when they’re not actively attacking.
You’ll need to land the same counter from the first part of the fight in order to finish this monstrosity off.
Golzuna
Golzuna might deceive you. At first, it might look like a not-so-innocent member of the same species that the game used in the melee counter tutorial at the beginning of the game. A swift counter and shot later and it begins to transform!
Its next form is another familiar foe, another crab-like enemy that gets up on its hind legs to attack. The difference this time is that you can’t counter its main attack. When it rears up on its hind legs, either slide underneath or space jump over it and shoot it in the back. This is one of the few boss fights where both missiles and normal beam shots deal damage.
After rinsing and repeating this process a few times, Golzuna transforms into its last form. It’s fairly similar to the enemy in the second phase, but this time equipped with a few new attacks. Its main attack is really hard to predict and avoid; it shoots out glowing pink projectiles that spread in a cross shape. They’ll usually make a grid or pattern that keeps you in the air for a set amount of time, but the pattern is hard to predict, so don’t stay too close to a wall or the enemy.
When you get the chance, either slide underneath it or jump over the enemy and shoot it from behind. Like the other phases, there’s no opportunity to counter it, so just keep shooting.
After it takes enough damage, Golzuna will transform one last time, this time into a large, floating X Parasite like in the last phase of the Escue. Shoot it with a few missiles to dispatch it. Like last time, it drops health and missiles with each shot, so by this point, you should be in the clear. Kill it to get the cross bomb.
Raven Beak
Dread doesn’t hold back on its boss fights, but this one’s a doozy—following the reveal that Raven Beak’s been telling Samus what to do all along, stringing her along into his talons. Only, you’re not going to play into his plan this time. This is the game’s hardest fight—hang in there, though, you got this! Take things one-by-one with mastering his attacks and phases and you’ll see the thrilling conclusion of a story 35 years in the making.
You’ll need a lot of missiles for this fight, so make sure you come prepared. If you find you’re running out, we recommend that you go and do some good old-fashioned Metroid-style backtracking to fill out your arsenal more.
The Chozo warlord’s most basic and predictable attack is a series of swipes with his talons. If he lands the first hit, it’s a bit tricky to escape without taking a second hit, so do your best to jump out of the way when he glows pink and does a wind-up when you’re near him.
One of his slower attacks is a large projectile that looks like a black hole. You can destroy it to get some missiles and health back. While shooting it is an effective solution, I’ve found that the power bomb is more effective. The moment you see him point his cannon upwards and start to glow purple, you can go into the morph ball and charge up the power bomb and release it just in time. This is really the only time you can use it effectively in the fight, so don’t worry too much about running out of ammo.
When he glows blue and points his arm cannon upwards, be ready to dodge his biggest attack: nearly the entire room gets covered up except for a very small area near him. Use your slide or the flash shift and crouch to stay in the safe area.
The only other attack in his arsenal in this phase begins when he screeches. Once you hear a screech, crouch, slide or go into the morph ball to avoid getting hit. If you successfully avoid taking damage during this section, the camera will change angles and Raven Beak will attack you head-on.
If you counter his attack, you’ll need to fire as many missiles during the quick time event. You might not be able to end this phase of the fight after just one of these, so keep at it. Once he begins to glow gold, you’ve made it to phase two.
This is definitely the trickiest phase if you don’t figure it out. While Raven Beak’s glowing gold, he’ll do the same attacks as the first phase, but there’s a catch. You can’t deal any damage to him with missiles or your power beam.
Instead, you’ll have to wait for him to cross his arms and taunt you, and approach him yourself. This will trigger him to use a melee attack, which you can counter to get some missiles and health back, as well as get some free damage off.
The only other way to damage him during this phase is to counter a dash attack. He’ll briefly glow red, then flash and dash at you on the ground. After you land the first counter, he’ll attack again quickly, so pay close attention for the second white flash. If you fail that counter, you’ll take a lot of damage. If you succeed, you’ll enter another interlude where you need to mash the fire button to shoot as many missiles at him as possible.
After a few sequences like this, another cutscene will start, marking the beginning of phase three. The good news here is that your missiles can damage him again. The bad? He can fly. His entire moveset changes for this phase of the fight, but like a cornered animal, his attacks are more desperate and easier to punish.
When he starts to fly high up in the room, and spreads his wings, he’s about to slam down. That’s the attack that leaves him the most vulnerable, so have a charge shot and a few missiles ready for him when he touches down.
The other attack that you should be sure to punish is an aerial dash attack, where he charges towards you. If you’re on the ground when he does this, slide underneath him to avoid being hit. Once he hits the wall, he’ll be stuck there for a bit, so unload into him as much as you can.
One attack that’s nearly impossible to punish is when he aims his laser sight at you. Soon after, he’ll begin to shoot an uninterrupted volley of projectiles at you. Use your dash and space jump to go around him in a circle to avoid getting hit.
His deadliest attack, however, is when he hovers near you and aims his arm cannon at you. If you can, get away from him at all costs—he fires a massive beam of energy down at you and it does a LOT of damage.
Keep getting your licks in when you can to get through to the final stage of the fight. You’re almost there!
After a brief cutscene, he’ll tear out his wings and toss them aside. He’s grounded again and has all of his old moves from the first two phases back. He also has the aerial dash from his brief flight, but he only does it close to the ground. You’ll need to jump over it to avoid getting hit.
At the beginning of this part of the fight, he’ll shoot an orb that looks like a sun up to the ceiling. It fires shockwaves that you need to dodge while he does all his normal attacks. You can either shoot the big orb until you break it, or you can use a power bomb to clear the screen in one fell swoop.
If he grabs onto his arm cannon and starts aiming at you, watch out. He’s gearing up a deadlier version of the big laser attack from the last phase. If you can, keep jumping and using your flash shift to stay out of his sights.
If you see him glow, then flash white, get ready to counter him again. If you land it, keep firing missiles to get the most out of the sequence.
Keep damaging him until a cutscene where he starts walking at you begins. Counter two attacks in rapid succession and he’s toast.
Charlie Wacholz is a freelance writer and college student. When he’s not playing the latest and greatest indie games, competing in Smash tournaments or working on a new cocktail recipe, you can find him on Twitter at @chas_mke.