With Monster Hunter: World marking a new era for the franchise, hunters old and new are flocking to the mysterious shores of the new world to find the perfect dragon-skin ensemble. But things aren’t all quite what they used to be on these new shores, and there’s a whole host of intricate new features and time-old traditions to wrap your head around if you want to become a successful hunter. Whether you’re brand new to the world of Monster Hunter or a veteran returning once more to hunt, these tips and tricks will make sure you’re all set to make the most of your time out in the field.
Always eat before hunting
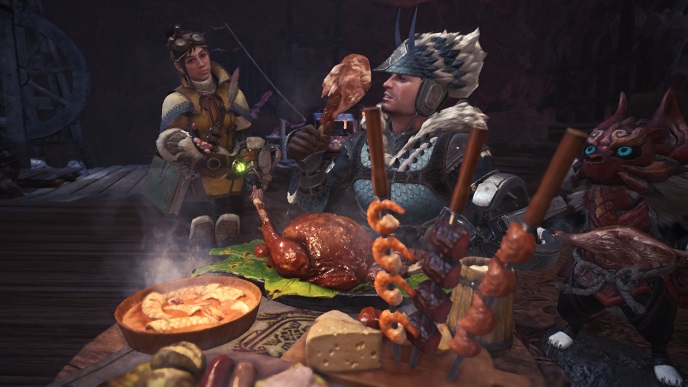
Food plays an important part in any successful hunt in Monster Hunter, and series veterans will tell you that the key to surviving against the big nasties out in the field is to make sure you fill up before setting out. By eating at the canteen you can apply significant buffs to your hunter, ranging from boosts to maximum health and stamina to direct increases to defense, attack and elemental resistances. As you progress towards the higher hunter ranks, you’ll begin to unlock optional quests that offer up new ingredients and meals that broaden the range of effects you can apply too.
It’s worth noting that the bonus only lasts for the duration of the hunt itself or until you faint, but if you know you’re going to need an extra leg up in attack or defense, choosing your meal strategically can make things go a lot smoother when you’re squaring off against a particularly nasty foe. Don’t worry if you forget to eat before embarking out into the wild, either, as there is a makeshift canteen located in each of the camps out in each explorable area.
How threat works
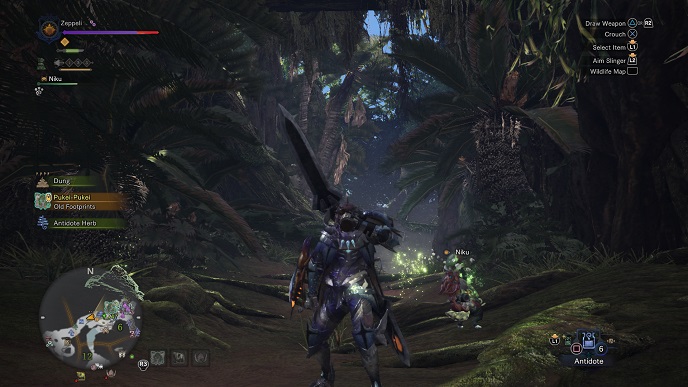
Sooner or later you’re going to get hit hard in the face by a stray tail swipe or monster claw, leaving you battered and in serious need of medical attention. Many will attempt to pop a quick potion as soon as possible in a desperate attempt to save themselves from being carted back to the camp, only to be chased down even more aggressively by their quarry than ever before. This is because while monsters will randomly cycle their target preference throughout the fight, certain actions will cause them to focus on specific people, typically when they are at their most vulnerable, so understanding how to work around this is vital to staying alive during those drawn out encounters.
So what causes monsters to focus on you then? Using medical items like potions, antidotes, and most curative consumables is the most common cause for a monster to start gunning for you. If you’re in the middle of a fight and in dire need of healing, try to either break the line of sight by ducking around a corner or hiding inside tall grass, sporepuff clouds, or by equipping the ghillie mantle before gulping down that vital medicine. Hunters using ranged weapons like the bow or bowguns also generate an increased level of threat compared to close-range fighters, so mastering when to dodge is important for anyone attacking from afar.
Farming Kelbi horns and Vespoids the easy way

While standard potions serve you well in the first few hours of the game, sooner or later you’re going to want to start using more potent medicines, chief among them being the Ancient Potion, which provides a 150 point boost to your maximum health and stamina for the duration of the hunt or until you’re knocked out and sent back to camp. Not only does this boost make prolonged fights much safer and more manageable, but the bonus itself stacks alongside any food buffs you may have applied from the canteen, making you more durable and ready to take down your foe. Unfortunately one of the key ingredients required to make the Ancient Potion is a Kelbi horn, which is obtained by dealing blunt damage to the head of the deer-like Kelbi creatures. The problem is that farming horns with a regular weapon can be quite tedious, as it can be somewhat tricky to aim for the head on such a small creature, and any higher level weapons are likely going to cut the Kelbi in half before you have a chance to break off that valuable horn.
Thankfully each hunter has a secret horn-farming weapon in their arsenal in the form of the capture net. While the net is mostly used to nab endemic life to add to your pet collection, when fired at larger creatures it deals a maximum of two damage as blunt, and several shots against the head of a Kelbi should be more than enough to persuade it to part with its precious materials. The quickest way to access a herd of Kelbi is to load into the South West camp of either the Wildspire Wastes or the Coral Highlands, jumping straight down from either camp to find a herd of Kelbi that regularly respawn.
Later on in the game when you reach the high rank missions, you may also find yourself in desperate need of materials from the wasp-like Vespoids that can be found across each zone. Typically these insects explode on death, preventing you from carving them unless you kill them through alternate means like using poison smoke bombs. However, much like with the Kelbi, the capture net’s minimal damage can take out a Vespoid in four or five hits without making them explode, giving you free access to those valuable carves without spending resources on poison bombs in the process.
Monster mounting made easy
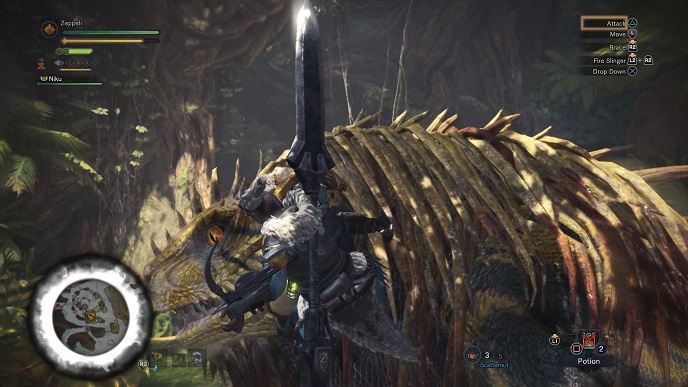
Mounting a monster can be a useful way to knock it down, giving you some valuable time to sink in a few precise hits to key areas of the creature. However, mounting comes with its own set of challenges which demand that the player attempting to rodeo the beast to the ground pay close attention to what is happening to avoid being thrown off or smashed into a nearby wall. Each creature has its own tells and warning signs to show you when to brace and when to move out of danger, but these aren’t always obvious and can be easily missed when you’re in the thick of the action. To help with this, make sure that you have the on-screen contextual button prompts enabled in the options menu, and then the next time you mount a monster pay close attention to the prompts in the top right of the screen. When a monster is about to try and shake you off or ram into a wall, the relevant prompt in the top right will become highlighted, essentially telegraphing what is about to happen and allowing you counter it reliably.
Resourceful hunters can also make use of the slinger when mounting to make downing the monster much faster by using Scatternut rounds. Simply make sure that you’re equipped with a Scatternut, which can be found hanging up high from vines or tree branches in most areas. Once you’re armed, mount a monster as usual and then move over to the head of the creature before firing off a volley of Scatternut blasts into its face. If all goes to plan, the monster should come tumbling down in record time, giving you more chances to put the hurt on to those exposed body parts.
Dealing with Effluvium gas effectively
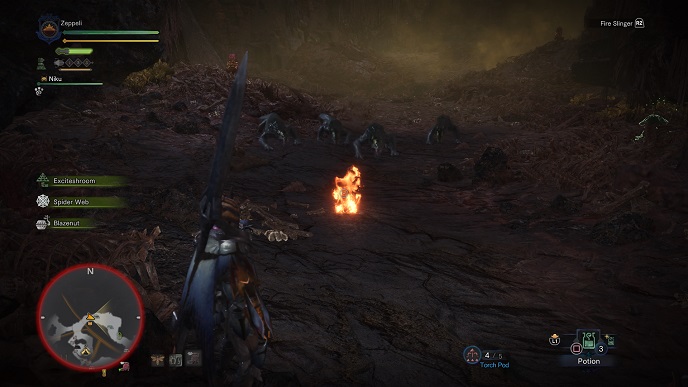
After you reach a certain point in the game, you’ll come across a poisonous yellow mist known as Effluvium gas which constantly depletes your health while you’re stood inside it. This gas, while not necessarily deadly by itself, can become a problem when monsters that are immune to its effects try to take a fight in the middle of the affected area. Fighting a monster in these cloudy zones can put you at a disadvantage, especially if you take a heavy blow and are unable to heal the damage before the gas finishes you off. You could try and lure the monster away from the poisonous region in order to take the fight somewhere safer, but this doesn’t always work as the monsters can sometimes be stubborn and refuse to budge.
To help overcome the noxious gases be sure to look out for a Slinger Torch Pod, which can usually be found at the entrance to the camps in this particular region. Once you’re armed with some torch pods, when you enter the poisoned area, fire off a single torch pod onto the floor, which will in turn clear away a fairly large radius around the pod, making it safe for short while. It’s important to make sure that you hit the floor when attempting this, as any pods that hit a monster will deal damage instead of clearing away the Effluvium gas.
Get your Palico a Plunderblade
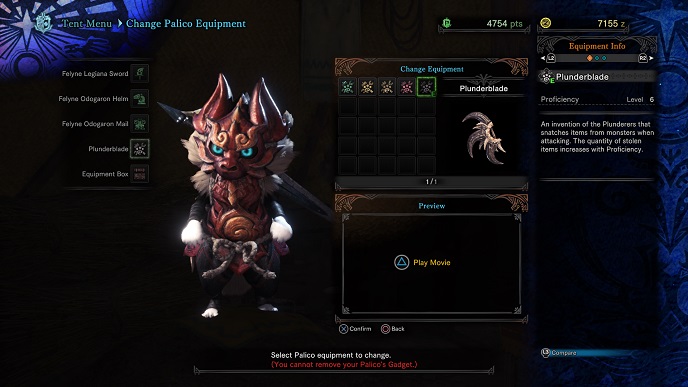
Along with their extensive wardrobe of eccentric outfits, your feline companions also come equipped with a very useful utility item that they will attempt to use sporadically throughout each fight. These tools differ quite widely, and can range from healing boosts like the vigorwasp spray to the debilitating stuns of the flashfly cage. Above them all however is the Plunderblade, a set of dual crescent daggers that can allow your Palico to steal extra monster parts mid-fight, increasing your overall haul of valuable materials as the fight goes on. This may not seem like much compared to the more support-focused items available, but the ability to drastically increase the rate you earn specific parts is invaluable when you reach the later stages of the game that are heavily focused on acquiring rarer parts from difficult monsters.
To obtain the Plunderblade you will first have to acquire the other three gadgets from the Ancient Forest, Wildspire Wastes, and Coral Highlands, which requires you to find and befriend each of the Grimalkyne tribes in their respective areas. Once you’ve set up relations with each tribe, be sure to speak to the Lynian researcher in each area too. If the Lynian researcher doesn’t appear in the relevant area, try leaving the zone and then coming back to force them to spawn in. You will also need to make sure you have at least one piece of raw meat in your pouch, as well as making sure that you have completed the main assignment quest that unlocks the lower bowels of the Rotten Vale before attempting to get the Plunderblade.
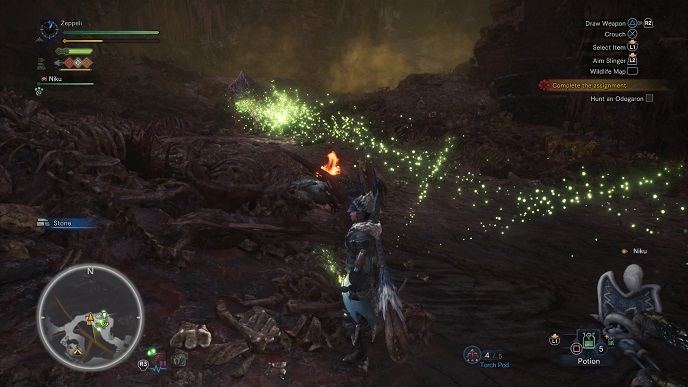
Once you’ve completed all of these tasks, head to the central camp in the Rotten Vale and make your way over to zone 13 and you should see a stray Grimalkyne that flees when it spots you. Talk to the researcher in the corner, and then leave the area for a few minutes, during which time you could go and gather from some nodes or take down the local Odogaron. After about five minutes running around other areas of the Rotten Vale, head back to the researcher who will then direct you towards zone 15. You should see the Grimalkyne from before as you head towards zone 15, who will once again flee, but this time you can follow it to a dead end in the nearby caverns. The Grimalkyne will climb up an impassable ledge, which is your signal to walk into the clearing and place down the raw meat before crouching and hiding around a nearby corner out of sight. If you’ve done it right, the Grimalkyne will climb down and call for some friends before a cutscene plays, completing the quest and rewarding you with the Plunderblade.
Making the most of your Scoutflies
One of the best new additions to Monster Hunter: World is the scoutflies, a swarm of helpful sentient signposts that lead you naturally through the thick brush of the wilds towards whatever foe or treasure you’re looking for. Learning to properly utilize these flies is the key to finding what you’re looking for quickly and efficiently, leaving you more time to get down to the monster slaying at hand. One of the most important features found on the map screen is the ability to manually tag any relevant node, creature or point of interest, which in turn marks it as the destination and causes the scoutflies to lead you directly to it, much like it would when hunting a monster from discovered tracks. This is especially useful when you’re out on expeditions to gather key materials for crafting, as it can be used to lead you directly towards mining nodes, bone piles, and any of the other key resources found in the field.
The map can also serve as a cheat sheet for finding out key information about monsters you’re currently fighting, providing your research level with that specific monster is high enough. After a while, you will start to see extra information on the monster’s icon itself which denotes whether it is exhausted or near death. A giant cross will also appear when the monster flees, denoting where it is intending to head to, which is especially useful when fighting flying monsters as you don’t have to wait for them to land to find out where to go next.
How to get more monster parts
Crafting armor and weapons out of the fleshy remains of your fallen foes is one of the cornerstones of the Monster Hunter formula, but it can sometimes be quite difficult to make sure you’ve got enough dragon wings and poison scales to make that fashionable new armor set you’ve got your eye on. Of course there’s nothing wrong with going out and slaying the same beast multiple times in order to get the bits and pieces you’re after, but the clever hunter knows when to optimize their efforts to get the most out of each hunt. Fortunately there are two key things you can do to maximize the amount of monster bits you get from exploits, and learning how to utilize them properly is the key to making it rain valuable viscera.
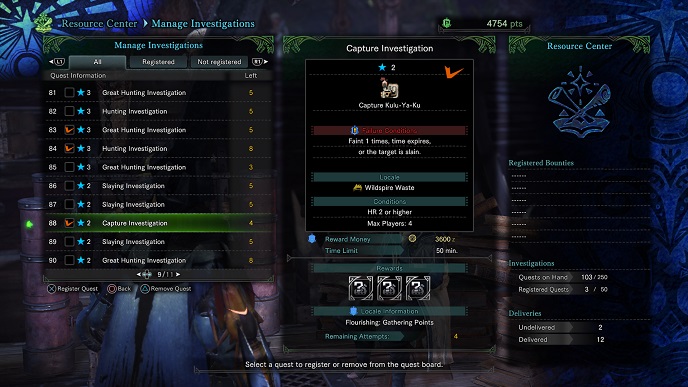
The first thing you should familiarize yourself with is the investigations menu, which can be found at the research commission on the ground floor of Astera. Here you can find a huge list of seemingly generic missions that cover a wide range of creatures and objectives. The key thing to notice here is that each of these investigations comes with a bronze, silver, or gold reward at the bottom of the details. These are extra rewards that you get by completing the mission, and can sometimes offer hard to get materials just for doing a regular hunt. If, for example, you’re after some Tobi-Kadachi parts to complete the armor set, it would be a good idea to find the investigation that involves hunting the Tobi-Kadachi in order to get the mission completion rewards as well as the bonus drops for completing the investigation.
An alternative method to getting more parts out of a monster is to try and capture them instead of killing them, however this will require a bit of forward planning as well as some knowledge of the process and the monster you’re trying to hunt. By capturing a monster, you forfeit any carves from the corpse, but the overall reward you get for capturing it is typically more than what you would have got from killing it, so it’s generally better to aim for a capture when possible. In order to capture a monster you will need to make sure you have a trap, as well as several tranquilizer bombs in your pouch. Monsters cannot be captured until you’ve weakened them to the point that they are near death, which is usually obvious when they start limping. When this happens, lay down your trap and lure the monster over it, and once triggered, throw a couple of tranquilizers at it to put it to sleep. You only have about ten to fifteen seconds before the monster breaks out of the trap, so be sure to throw your tranquilizers as soon as you can after it falls into the trap.
Silver Wyverian Prints and the Elder Melder
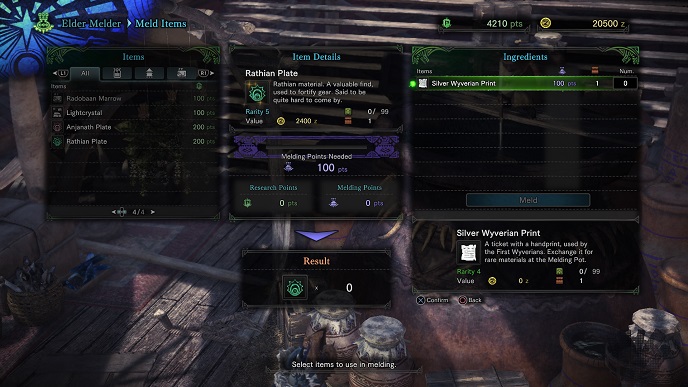
After a certain point in the game, a new vendor called the Elder Melder will appear in Astera, offering to trade various consumables and materials for more valuable items and parts. While most of these items can be obtained at very little cost to yourself, the Elder Melder also offers a number of very valuable and hard to find monster parts that can make farming for higher level armor and weapons much easier. The catch however, is that these specific monster parts can only be obtained by trading in a Silver Wyverian Print to the Melder, and these prints are themself quite rare. A number of people have speculated that these prints can be earned by fighting monsters in the arena after you capture them, but this doesn’t seem to be very reliable, if possible at all. Others have suggested that finding a First Wyverian Grimalkyne out in the wild can sometimes net you a print, but again this not only seems to be down to chance, but that there’s no concrete proof currently that this is even possible,
However, while the rumors circle around how you obtain these prints, there is one sure fire way to get your hands on a handful of prints each week by doing the limited bounties found at the research commission station on the ground floor of Astera. These secondary objectives change each week, and typically involve killing a specific number of a certain type of monster. During the first week, there was a total of two prints available as a reward through the bounty system, though it’s not clear whether this will continue to be the maximum available or if this will increase or decrease as more bounties come into effect. Whatever the case, be sure to keep an eye on those bounties each week as this seems like a reliable way to get your hands on those valuable prints, saving you some pain down the road when you’re desperately clamoring for all those Rathian spikes.
Save yourself some time with item loadouts
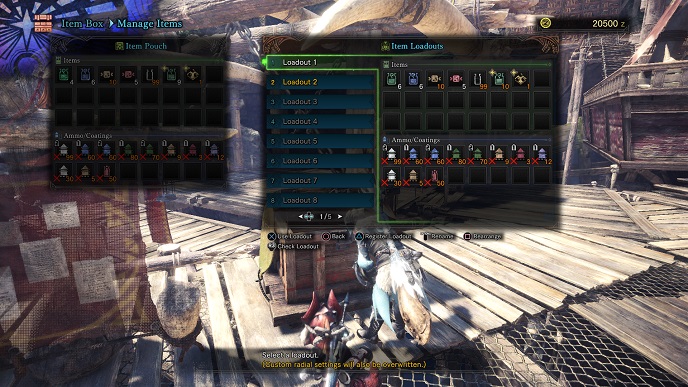
Space in your pouch is a valuable commodity, and it can be quite time consuming trying to micromanage each of the tools, potions, knick knacks, and materials that clutter up those precious item slots after each hunt. There is a way for you to streamline your inventory management though, letting you dump any excess materials and erroneous crafting supplies into your stash at the press of a button. This comes in the form of item loadouts, which can be accessed by pushing start when you’re in your item box.
From here, you can assign your current loadout into one of the 40 slots, letting you setup different loadouts for each situation. This is especially useful if you want to create a few preset inventory loadouts for either capturing or killing a monster, as well as creating sets that come with status-curing medicine for poison and paralysis monsters. Ranged weapon users will also find this feature incredibly useful for setting up different coating and ammo loadouts for the different weapons in their arsenal.
Andy Moore is a gaming freelancer based in the UK. When he’s not writing, he can be found staring blankly out of the nearest window, or spending way too much time on Twitter.