Find all of the game’s health upgrades with our Star Wars Jedi: Survivor stim location guide.
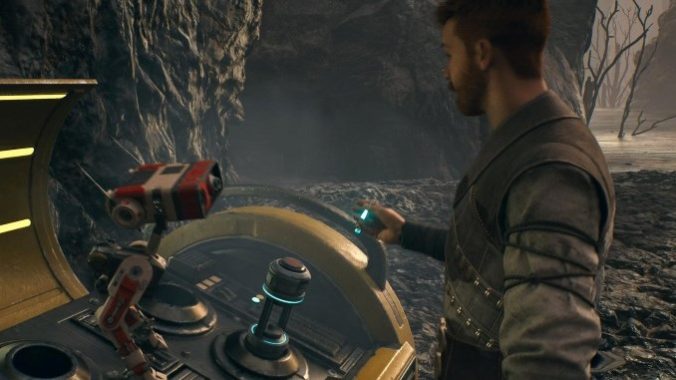
BD-1 provides a ton of useful services in Star Wars Jedi: Survivor, but his most important one is keeping Cal Kestis fit and healthy while mixing it up with raiders, Stormtroopers, and assorted galactic wildlife. At the push of a button BD-1 will pop Cal with a burst of health through the form of a stim canister, just like all your dad’s favorite baseball players taking greenies to make it through a double-header. The stims are exactly limitless, though; BD-1 can stock up on several at once, but they don’t replenish until you rest at a meditation point–a move that simultaneously brings every enemy back to life. Stims aren’t a perfect fix but they are still vital to success, and fortunately you’ll discover more throughout the game, with each one permanently increasing your total number of stims. So basically you really want to track these things down. The game doesn’t make it easy, though; from tough boss battles to complicated platforming tricks, you’ll have to go through a lot to catch ’em all. It’s also easy to completely overlook a stim location while running to your next goal. So if you need to beef up your health boosts and increase the number of stim canisters BD-1 keeps in his little droid noggin, here’s a guide to help you out. Good luck and happy hunting.
Coruscant Stim Location
You don’t spend a lot of time on Coruscant in this game, but you will find the first stim upgrade there. Head to the meditation point at Undercity Meats and take out the nearby security droid. In a nearby crate is that first stim. And that’s the only one you’ll find on Coruscant, as far as we’ve discovered.
Koboh Stim Locations
There are seven Star Wars Jedi: Survivor stim locations to track down on Koboh, which isn’t that surprising, given it’s by far the largest planet in the game. Some of them are far easier to grab than others, and you won’t be able to track ’em all down the first time you come to Koboh.
Let’s start with the stim in the Basalt Forest. Fast travel to the Basalt Rift meditation point and walk left. Soon you’ll come across a Mogu; it can be a tough fight early in the game, but it’s doable if you stay on the move and ace the quicktime event whenever the creature grabs you. Once you’ve beaten it, look for some vines to climb, and then walk beyond the rocks, where you’ll find the stim upgrade.
Perhaps the easiest stim canister to get on Koboh can be found in Doma Dendra’s shop in Rambler’s Reach. It simply requires you to collect a lot of Priorite first, which can be found all throughout Koboh. Once you have 10 shards you can buy a keycode in Doma’s shop, which gets you access to the locked room nearby. Inside is a stim. It’s definitely a better use of your Priorite shards than new hair styles or jukebox songs.
You can find a perk that grants another stim during the High Republic Chamber in the Valley sidequest, which starts as a rumor from Toa. Jedi your way through the chamber (these are elaborate physics puzzles, kind of like the shrines in Breath of the Wild) to acquire a perk that grants BD-1 an additional stim. This one has to be equipped at a meditation point, and goes away if you ever remove it from you active perk lineup.
Another stim can be found in the Observatory Understructure in the Mountain Observatory. You’ll fight this crazy cat named Urgost, the Fist of Rayvis, in one of the game’s more obvious From Software influences. Take ’em down, head down the hallway and through a partially opened door, and then grapple onto the floating balloons and launch onto the nearby ledge. There’s a big ol’ stim container there surrounded by some easily swept away Stormtroopers.
You can also find a stim in the Viscid Bog (some more Dark Souls-sounding business there) by the Gorge Crash Site, which is the first mediation point you came to when you crashed onto Koboh. You’ll need the lift and slam Force abilities to make it to this one. Behind that meditation point is a big metal door that can only be opened with the Force. Lift that up and take the elevator down. To your left will be three rocks down in the swamp that can all be raised with lift; they immediately start sinking again, so you’ll have to move fast from one to the next. After the third pillar you’ll land on a steady platform that overlooks the den of the Mire Terror (a big bad Mogu) and their smaller Mogu buddy. (Make sure you pet the bogling on this platform, unless you want to be a monster.) Jump down to the den, use your confusion skill on the regular Mogu, and then go grab the stim out of the canister while they dust it up with each other. And sure, you can always try to kill ’em both, if you’d like.
Make sure you keep talking to the regulars at Pyloon’s Saloon after every major story beat. They won’t just have new backstory to reveal but will also often give you rumors that lead to new sidequests. Case in point: at one point Mosey will tell you about the Gorocco Matriarch that’s been terrorizing settlers who wander into Dredger Gorge. This is by the Derelict Dam. Zap over there, walk to the workbench, check out the elevator on the right, use lift to open up the metal gate, and then have at it with the giant Gorocco. Once she’s gone you can pillage that crate for another stim.
The final stim in Koboh comes late in the game, when you’re headed towards a climactic battle with the main villain. In Foothill Falls at the base of the mountain you’ll meet the amazing Scottish-accented fisherman alien Skoova (wee dude really gives Babu Frik a run for his credits). Head to the Relter that hangs out by Skoova (no doubt hoping to steal some fish from him) and glide across the way to a landing where you can see a shack. You’ll have to use the Force to once again move some metal out of the way. After a battle head down a path and look for a Nekko; its jump will help you reach where you need to go. Use the Nekko’s jump to double-jump into a patented Respawn wall-run, which will let you grab hold of a ledge. (Don’t worry, you’re almost there.) At this point you should see a roller mine terminal that BD-1 can slice into. That’ll send a roller mine your way, and all you have to do is pull it with the Force and then shoot the mine towards the roof of that shack you saw earlier. If you hit the right spot on the roof, it’ll open up the shack and you’ll be able to grab the stim inside.
Jedha Stim Locations
Much of the game’s action takes place on Jedha, a desert moon planet first introduced in Rogue One. You’ll find at least two stims here.
First up, Sheltered Hallow in the Narkis Desert is pretty easy to find. This is one of the stims you can’t really miss because you come across it during the story. You’ll find it in a crate in the Sheltered Hallow.
The second stim on Jedha takes more effort. You’ll spend a solid amount of time on Jedha spelunking your way through ancient Jedi burial crypts, which certainly ain’t creepy or nothing. In the Crypt of Uhrma on the Pilgrim’s Path is an optional puzzle that’s a little difficult to suss out. You’ve got to Force pull four blocks on a wall of eight in the right formation. You’ll want to force pull the two middle blocks on the lower row, and the two corner blocks on the upper row. In other words, use Force pull on the first block on the left on top and the first block on the right on top, and then do the same with the second block on the left on the bottom and the second block on the right on the bottom. That will unlock Jedha’s second stim.
Shattered Moon Stim Location
You won’t spend much time on Koboh’s Shattered Moon, but you’ll still want to make sure you grab the stim upgrade there. It’s a bit complicated, though. Fast travel to the Automated Forge meditation point in the Abandoned Foundry, and head through the door on the right. Talk to the maintenance droid there, and it’ll tell you about a treasure in the factory’s lower levels. Walk past the droid towards a series of grates with electrical shocks running down them. You can climb these grates, but make sure you jump back and forth between the two of them so you don’t get shocked. At the top you’ll be on a small platform that takes you to an overhead grate that also has shocks running down it. Jump up and jungle gym your way across that grate to a small suspended platform on the right. From there you’ll see two ziplines with electric sparks on them headed towards a cylindrical tower. Jump on the closer of the two ziplines, and make sure you hop between them to avoid the sparks. when you get near the end of the zipline on the right you’ll see a third zipline even further to the right; jump over to that and it’ll take you to a wall-running section. Wall-run about a third of the way around the cylindrical tower, right up to the next zipline, and then look for a small platform to your left attached to the tower; jump or dash to that platform. You’re now inside that tower, and it looks like it only has one floor. There’s a ledge on the left, though, overlooking that floor, and a zipline suspended on the roof inside the tower. Jump on that zipline, and then double jump and dash to your left when you’re halfway across it. That should get you to the ledge, where you’ll find another stim canister.
These are all we’ve come across so far. If we find more, we’ll update this list like a game dropping patches the week of release. We sincerely hope this Star Wars Jedi: Survivor stim location guide has been of service to you and yours. And if you’re looking for more on Star Wars Jedi: Survivor, Paste is the place for you.