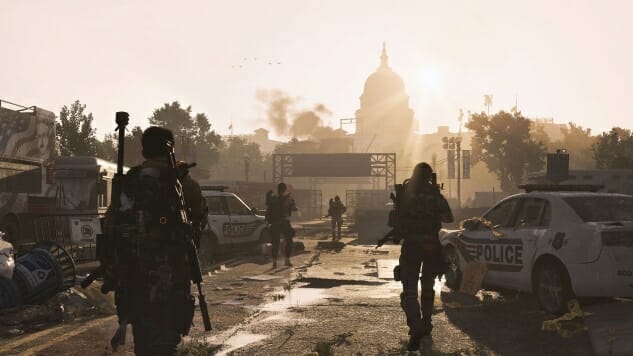
The Division 2 has abandoned the snowy urban sprawl of New York for new pastures as it hops on over to the war-torn capital of Washington DC. And as you’d expect, there’s plenty to do in the ravaged city, but with all the warring gangs and endless stream of loot to pick up, it can be easy to get lost in the fray, especially when it comes to the sprawling web of activities and tiers that make up the game’s endgame. To give you a fighting chance out in the field, we’ve thrown together a list of things for you to focus on when you make it to the later stages of the game so you can sit back and enjoy the ride without worrying too much about what to do when you reach The Division 2’s endgame.
Reach max level and World Tier 4
Before you can even think about the endgame of The Division 2 you’ll first need to get there, and doing so requires you to hit the maximum level of 30 and then complete several of the later missions with an increasing degree of difficulty until you reach the game’s current end tier, which is known as World Tier 4. While simply shooting your way through countless waves of enemies is one way to get those levels stacking up, there are a few things you can do to gain experience more efficiently and help make the journey go a little bit smoother.
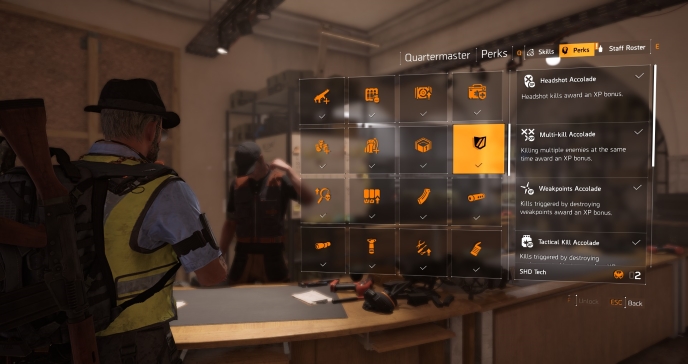
The first thing you should do from the very start is make sure you start pouring those SHD points into the experience gain accolade perks at the Quartermaster. The bonuses they grant are minor, but over the course of your entire journey, these minor boosts will soon stack up and go towards getting levels faster. The big experience bonuses will come from completing missions, however, so you should focus on doing the main and side missions as a priority. Each time you finish one of these missions you will receive additional experience, so this can be a great way to chase down levels fast, plus it will help you progress towards the endgame much faster.
If you run out of missions or simply want a break from the storyline, then the next best thing to do when chasing down experience is to try your hand at the bounties and the projects available on the top floor of the White House. Both of these are lucrative experience earners in their own right, with bounties offering guaranteed boss spawns and loot drops, and projects allowing you to make use of unwanted gear and resources for easy wads of experience.
Once you’ve finally stepped onto that max level cap, the next goal is the unlock World Tier 4 as soon as possible. The reason you don’t want to hang around the lower World Tier zones is because they are hard-capped on what level gear they can drop, so you’re never going to progress after you reach certain gear score limits. Try to push forward as much as possible, completing the necessary missions and strongholds in order to get to World Tier 4 as a priority.
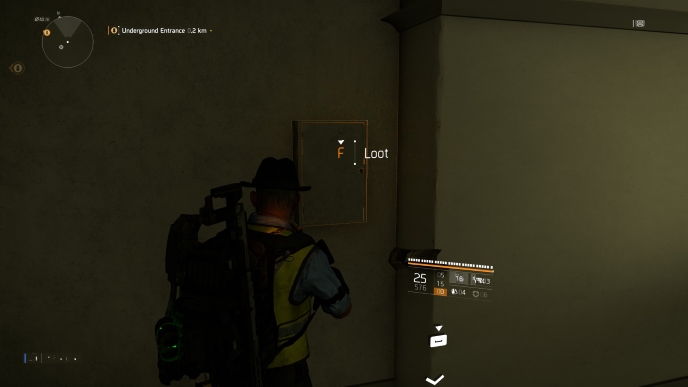
The sewers of DC might not sound like the most obvious location for treasure, but making a regular trip through these underground tunnels is a great way to stock up on a number of important resources that you’ll need to have stockpiles of at endgame. As you walk through the underground network you will come across plenty of crates and bags dotted around that contain valuable pockets of electronics, polycarbonate, and titanium which are all essential components used in crafting gear later on. These resources are also required to upgrade your crafting bench, so if you’re running low head down into the sewers to stock up.
Along with the crafting materials, the sewers also contain a hearty supply of key cabinets for you to stock up on the various faction chest keys. These chests are scattered around the mission areas and contain valuable high end loot, so it’s worth stocking up on keys when you can to make your mission runs more lucrative. The keys aren’t specific to the faction area you’re searching in, so you’ll have a shot of getting any of the four main faction keys from each cabinet.
While there are a few sewers to visit on your travels, the best one to frequent is the sewer system underneath West Potomac Park as it contains a number of side rooms to search as well as the larger open room where the SHD tech is. These rooms are littered with searchable crates all along the edges, so be sure to search thoroughly to grab as much as you can on your way around.
Get your gear ready for the raid
There’s a lot we don’t know about the upcoming 8-player raid other than it’s currently inaccessible, and that it requires you to have reached World Tier 4 and have a gear score of 425 or above to enter. With that said, it’s a good idea to start working on your overall gear setup if you want to be fighting ready when the raid does eventually activate. To that end, you’ll want to start regularly doing activities like missions and strongholds on harder difficulties, daily challenges, and levelled up control points.
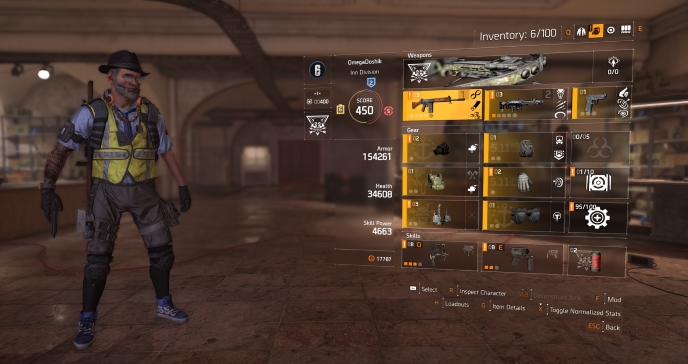
While 425 might be the lower limit for entry, you will want to try and push towards the upper limits of the currently available range which is currently sitting at a gear score of 250-260. While ramping up these numbers, you should try to prioritize gear that has the same set bonus to give yourself additional passive bonuses. Each of the gear manufacturers offer their own set bonus which comes in three tiers, and when you equip three items from that manufacturer you’ll receive the full set bonuses. Try to be mindful of what it is your character is built to do, as there are sets for increasing healing, dealing more damage to specific enemies, reducing incoming damage and more. Since it’s only three items per set bonus, you should also try to avoid equipping more items from the same manufacturer as there’s no current evidence to suggest the same bonuses stack.
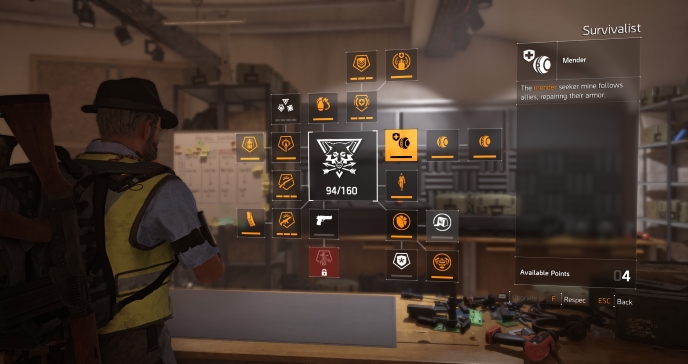
When you reach level 30 and complete the first set of strongholds to unlock World Tier 1, you’ll be given the option to choose one of three specializations. These extra skill trees offer a number of extra passive skills on top of your current talents and perks, as well as a signature weapon that defines the tree you decide to use. These skills vary by type, but most offer some form of bonus to things like healing, headshot damage, cooldown reductions and more, so it’s worth getting these skills as soon as possible. Much like the SHD points unlocked skills, these passive abilities are unlocked using proficiency points, which can be gained from earning XP after level 30, as well as by completing certain activities that reward proficiency points like the daily missions.
It will take some time to unlock every skill on the specialization tree, however, and some skills are more useful than others. For the Demolitionist you should prioritize the Demolitionist Tactical Link for increased damage across your group, as well as the Explosive Ordnance ability for increased explosive and skill damage, and the Group Signature Ammo Supply skill to help keep your team’s special ammo reserves topped up. For the Survivalist you should try to focus on getting the Incendiary Grenade, which is a very powerful control skill when fighting heavily armored enemies, as well as the Triage Specialist and Elite Protection skills to help mitigate the sting of endgame elite bosses. With your Incendiary Grenades in tow, grabbing the Survivalist Tactical Link will help you and your team dish out more damage, and the connected Crunch Time skill is a great way to keep skill cooldowns at a minimum. For the Sharpshooter, your main skills revolve around boosting raw damage for you and your team, so taking the Sharpshooter Tactical Link is a must as it increases the headshot damage of every team member in front of you by 10%. You should also be focused on grabbing the This Is My Rifle perk for extra rifle damage, and the One In The Head perk for even more headshot damage. Deft hands is also worthwhile as rifles generally have long reload times so reducing that will help boost damage even more. You should also look to get the Signature Weapon Damage boost as the .50 Cal can push out extremely high headshot damage numbers, so bumping that up can be a great way to cut through heavily armored elites.
Visit the hidden gear merchant
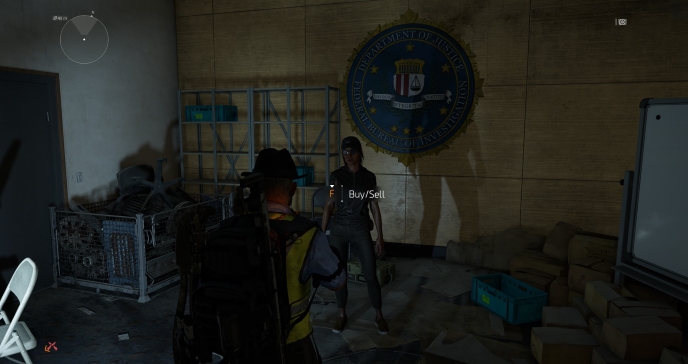
If you’ve reached World Tier 4 and you’re still hurting for higher level loot then you might be able to bump up those numbers with the help of your local vendors. The vendor inside the White House will occasionally offer you level 430 gear but if you’re trying to climb even higher than that then you might have to seek out Cassie Mendoza, a travelling merchant that never stays in the same place for long. To Find Cassie, you’ll first need to locate Jared Nash, a bounty broker known by the name “The Snitch.” Nash also appears randomly across the game world and can be a little difficult to find, so look out for unknown question marks to help root him out. After talking to Nash, a vendor icon will appear somewhere on the map and that’s where you will need to go if you want to browse Cassie’s current wares.
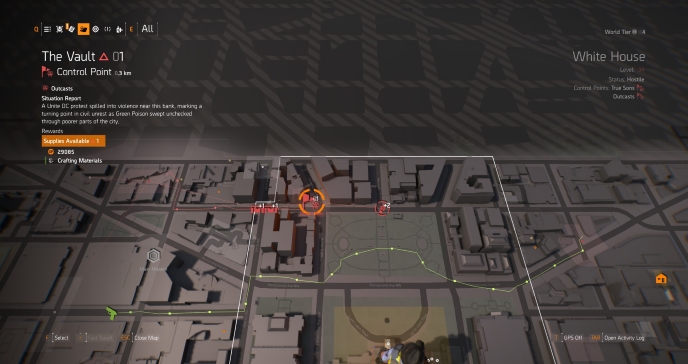
Level up control points for better loot
As you fight for control of Washington, you may have noticed a number of control points scattered across the map. Liberating these points in the early stages of the game would usually grant access to a supply cache full of loot and resources, but when you reach higher World Tiers these nodes can be upgraded, providing a greater challenge while increasing the reward.
To put things in perspective, a level 1 control point is normal difficulty, level 2 is hard, level 3 is challenging, and level 4 is heroic. To upgrade a Control Point, all you have to do is complete the activities surrounding the point, with each completed task usually bumping the point up by one level.
The goal here is to level up a Control Point until it reaches at least level 3. At this level, the Control Point will not only offer a decent amount of XP for clearing it, you’ll also gain some level-appropriate gear, as well as a blueprint that you can use to craft potentially higher level equipment back at the base. It’s worth noting however that while level 3 is doable solo, if you bump the point up to level 4 it’s going to be a struggle to get your rewards without the help of others.
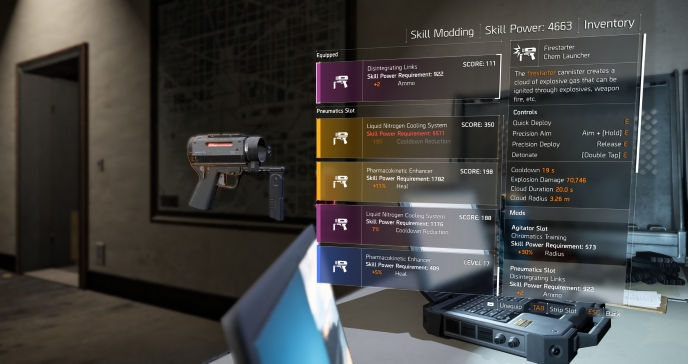
Don’t forget to install mods on your gear
It’s easy to forget about mods as they’re mostly inconsequential while levelling, but when you do finally reach World Tier 4, mods can make a huge impact on your overall effectiveness. Mods are split into two types. Gear mods are slotted into armor and provide additional boosts to stats like total armor, damage output, elemental resistances and more. These mods are generally universal and can slot into their respective slots on the armor, which is divided into offensive and defensive categories. On the flip side, there are skill mods that slot directly into a certain category on one of the eight skill gadgets, with each mod boosting something specific about that skill. These upgrades can alter anything from the radius the skill effects to the number of charges the skill has to use up, so it’s worth getting these installed whenever possible and they can vastly improve the effectiveness of the skill.
When it comes to skill mods, it’s important to pay attention to the prerequisites they need to activate. While you can freely slot them into the gadget’s mod slots, they won’t take effect unless you meet the power level required for the skill. For the more common mods, these numbers usually sit around 300 to 900, but the more powerful mods will demand much higher numbers, with some asking for anything up to 6000+ power before they take effect.
Start working on exotic weapons
It’s not clear how things are going to unfold once the raid drops, but for now at least there are a couple of exotic weapons that can be obtained, with each offering an impressive list of mods that make them unique. There are two exotics that stand out as being fairly easy to obtain, so grabbing the necessary components and blueprints is a smart idea while waiting for the next World Tier to unlock. The first exotic is the Chatterbox, a P90 with talents that boost rate of fire while replenishing ammo simultaneously. To get your hands on this weapon you will first need to acquire three crafting components before heading for the blueprint, but it’s worth noting that the parts aren’t always a 100% drop so if you don’t get it the first time, you’ll have to come back the following day when the spawns have reset. The three individual parts can be found in the Hyena crates in three different districts, with one part designated for each area. The Loaded Canister can be found in the Downtown East area and can be found in any of the Hyena crates in the open world as well as the one in the district’s main mission, Grand Washington Hotel. For the Creative Magazine you will need to visit the Federal Triangle district, and the part itself can be found inside the Hyena chest in the Jefferson Trade Center mission. The final component is found inside the Hyena stronghold inside the District Union Arena, once again located inside the Hyena chest within. With all three parts collected, you’ll then need to visit the Bank Headquarters mission over in Downtown West and play through it on challenging difficulty. Once you reach the CEO’s office before you descend down the elevator shaft, be sure to grab the second keycard for the bank vault hidden inside the false wall in the office. Once you reach the vault, open the locked door and the blueprint can be found inside the Hyena chest within.
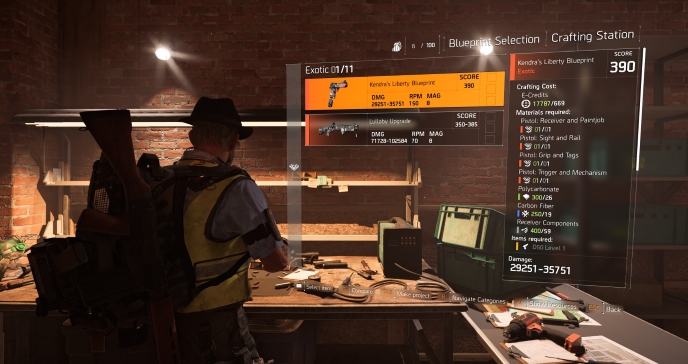
The second exotic you can unlock is a sidearm named Kendra’s Liberty, and the main focus of this weapon is to help deal with enemy electronics which will then in turn offer a huge damage boost to the next bullet fired. To obtain this pistol, you will first need to have completed the Capitol Building stronghold at least once, as doing so will get you the first of the crafting components needed to make the weapon. After you’ve done this you will need to complete three specific missions on Hard or above difficulty, and it’s important to note that the missions have to be the normal version and not the invaded variant. To get all the remaining components you will need to complete the American History Museum, Viewpoint Museum, and the Space Administration HQ missions. Once you finish the last of the list, you will need to also locate an exotic D50 pistol, which is the last crafting part required to make this weapon. Unfortunately there is no way to reliably obtain a D50, so you’ll just have to grind it out until one drops.
Andy Moore is a gaming freelancer based in the UK. When he’s not writing, he can be found staring blankly out of the nearest window, or spending way too much time on Twitter.