When you’re wading neck deep through the drudges of political espionage and back alley assassinations, it’s easy to get sucked into the vortex of severity that surrounds the Hitman series. The truth however, is far more absurd, and if you’re willing to look beyond the occasional garrotting, you might just notice that Agent 47’s world is filled with more obscurities than a J.K. Rowling novel. Here are ten of the strangest surprises in Hitman Season One.
10. Sapienza – To the briny depths
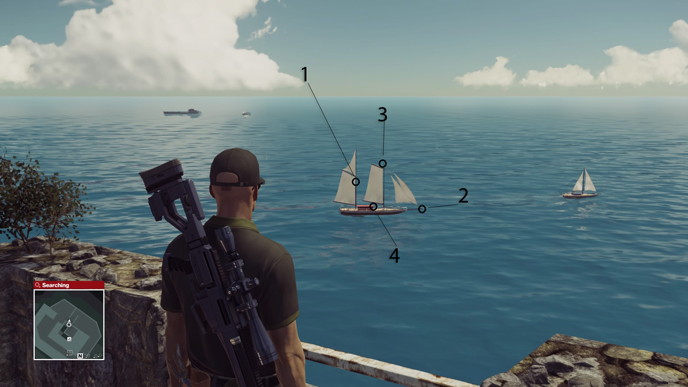
A terrible secret lurks under the surface of the Sapienza sea, and if your aim is steady enough, you can summon it from the depths. To unleash the menace under the waves, you’ll want to make sure you have the Jaeger 7 unlocked, which you can get by reaching mastery level 5 on the Paris level. On the planning screen, make sure you select the Jaeger as your smuggled item, and place it at the Sapienza Ruins location.
After starting the level make your way through the mansion and head to the ruins that overlook the coastline. Grab your stashed sniper rifle at the base of the tower, and head up onto the roof, taking out the stationed guard when you reach the top. Equip your rifle and locate the ship pictured, which will be stationary. To trigger this Easter egg, you’ll have to shoot the four bells hanging on the ship in the correct order. The bells can be a little tricky to hit, but a ringing noise will play to let you know if you’ve successfully hit each bell. Once you’ve completed the combination, un-scope and watch as the sea claims another victim.
9. Marrakesh – Bullwinkled
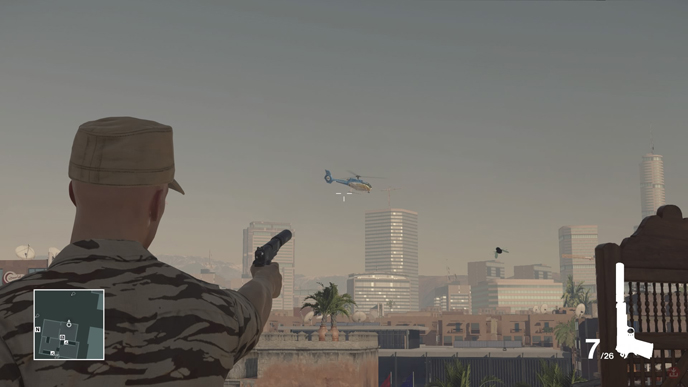
Known for its expansive bazaar, Marrakesh’s sprawling alleyways and stalls are home to all manner of curios. However, mere trinkets pale in comparison to the secret that lingers in the skies overhead. To trigger this Easter egg, make sure you start at the default spawn point with your silenced pistol. Head through the lamp shop and follow the path as it turns around the corner. From here, walk past the right turn and enter the building on your right. Walk upstairs and deal with the armed guard, the consulate employee, and the shopkeeper who will patrol up and down the stairs.
Once you’ve created a little breathing room, equip your pistol and aim towards the helicopter that is circling over the main area of the bizarre. Fire off a few rounds into the helicopter (there’s no rush, so take your time when aiming) and after you’ve emptied a full clip into the chassis, a large surprise will come crashing on anyone unlucky enough to be in the wrong place at the wrong time.
8. Bangkok – La Cucaracha
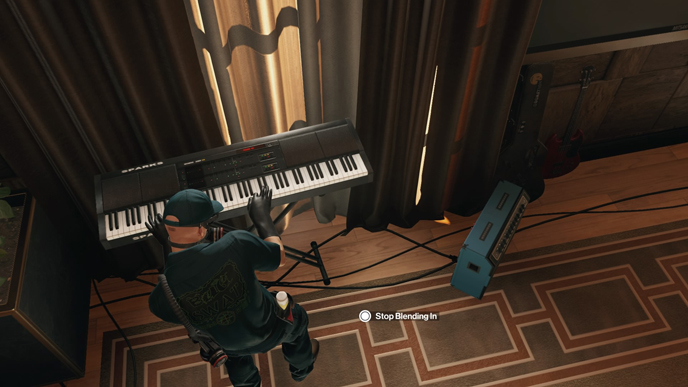
It seems the illustrious Chao Phraya River hotel has a bug problem, but no one seems to fully appreciate the scope of the infestation. Fortunately, Agent 47 is an expert exterminator and with his guiding hand, a quick costume change, and a little musical talent, 47 will show the hotel patrons just how widespread the problem is.
Beginning at the default spawn, make your way inside the hotel and into the restricted area where the exterminator and a hotel employee are working. Dispatch the pair, and steal the exterminator’s threads. Exit the room and find the hotel manager, who is usually patrolling around the main atrium of the hotel. Interact with her and she will arrange to evacuate the recording studio where your target, Jordan Cross, is performing. Make your way upstairs and wait until everyone has left the studio before heading up into the now empty suite. Proceed towards the back of the studio and interact with the keyboard against the back wall. 47 will start to play a familiar song, and once he’s finished your work here is done. Exit the studio and head towards the entrance of the hotel where you started. If you haven’t already noticed what’s changed, look to the horizon across the river. There isn’t a boot big enough to save the world now.
7. Bangkok – They never forget
Statues are creepy, right? Caricatures of living creatures, frozen in time and destined to silently observe the same spot in the world for eternity. How could they possibly get worse? Well, you’ll find out soon enough.
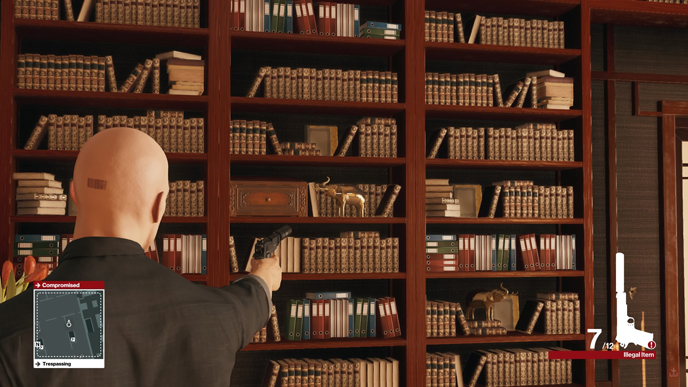
To start, you’ll need to perform a small amount of mass murder, but as a trained assassin I’ll assume you’re okay with that. Head to the Queen suite and clear out all of the people inside. Your main objective is scattered between the two libraries opposite each other on the lower floor of the Queen suite, as well as the office space towards the back of one of the libraries, and the master bedroom behind the small stone statue on the upper level. Whilst it is technically possible to complete this without killing everyone, you run the risk of alarming some of the hotel workers if you don’t evict them beforehand, which will make getting to the final reveal more complicated. Once the coast is clear, equip your silenced pistol and start tracking down all 18 golden elephants dotted around the bookshelves across all four rooms. You will also see some silver elephants alongside the gold ones, but these do not count towards the total and can be ignored. Once you’ve shot all of them, head down to the main entrance of the hotel and take a look at those golden elephant statues guarding the stairs.
6. Colorado – Known for his fiery looks
Nicolas Cage isn’t the only person who can have fun with spooky cults and high temperatures, thanks to the next surprise involving a scarecrow, the mysterious tolling of bells, and lots of spontaneous combustion.
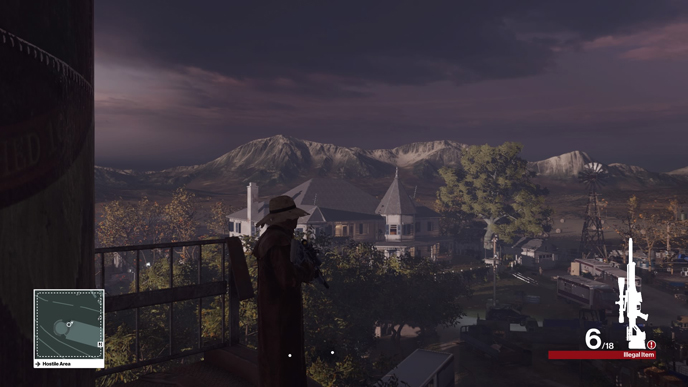
To begin, you’ll want to make sure you place the Jaeger 7 sniper rifle at the watchtower drop off point. Starting as a mechanic already inside the compound also helps, but isn’t necessary. Make your way over to the area with the scarecrow in it, which can be found in the walled off section adjacent to the house where Sean Rose hangs out with his team of hackers. Once the guards have patrolled away, jump into the suit and sneak over to the watchtower, taking care to deal with the guards on the roof at the base of the ladder if necessary. From here, you’ll have to shoot four separate bells scattered across the map in out of bounds areas. The bells can be a little hard to distinguish due to their distance from the watchtower and the level 1 Jaeger’s lack of zoom, so take a look at this video from YouTuber Leet It B for the precise locations of each target.
Once you’ve struck all four bells, try going for a leisurely stroll through the camp and taking in the sights, the sounds, and the smells of your new found presence in the world. Be warned though, taking off your adorable scarecrow costume will see you lose your explosive new personality.
5. Colorado & Marrakesh – Happy feet
When they’re not being assassinated on the whims of a highly trained murder man, the citizens of Hitman are no strangers to the art of dancing. So much so, in fact, that twinkle-toed performers can be found in two separate missions, and provided you’re willing to do some prep work yourself, you can get a front row seat to the show.
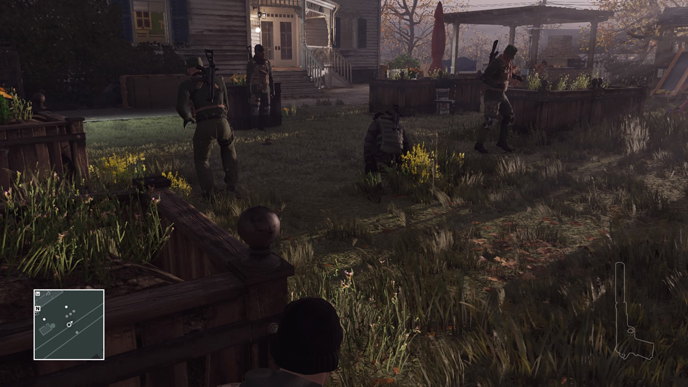
In Colorado, make your way over to the back of the house where the murder twins Ezra Berg and Sean Rose usually hang out. Start by liberating a guard outfit from one of the nearby soldiers, and then walk up behind the drill instructor who is barking orders at three exercising soldiers. Now this is where it gets a little strange, but bare with me. Grab the avocado from the floor behind the instructor, and throw it at his head. Now run over to the radio next to the shack on the right of the training soldiers, turn it on, and hide. If you’ve done it correctly, the boys will take a break from their workout and get their groove on.
If a low-key hoedown isn’t enough for you, the military personal in Marrakesh are more than happy to kick things up a notch. Start by sneaking into the occupied school, making sure not to set off any alarms once inside. Creep up onto the first floor and take the commander’s uniform. Once you’re suited up, you’ll need to dismiss all of the patrolling soldiers in the hallways on the ground and first floor, then head over to the office with the two guards sitting in it on the ground floor. Walk over to the PA system and turn it on, followed by the radio that sits in front of the microphone. Head on outside to find the guards you sent on an early break, kick back, and enjoy your one way ticket to funky town.
4. Colorado – Away in a puff of smoke
What do you get if you combine a whole bunch of avocados, a vial of hallucinogenic drugs, and a kids bike shaped like a dinosaur? That’s right, it’s the best getaway vehicle you’ll ever use in your serial killing career.
Before you attempt this, you’ll have to do some prior setup to make things easier for yourself. Ultimately, triggering this easter egg can only be accomplished by killing all of your targets and getting to a state where you can exit the map, and since the story mode mission forces you into the one-way bunker at the end, this has to be done during a contracts mission. To make things easier, there’s an incredibly simple contract you can create yourself which will allow you to immediately start work on triggering this ludicrous escape plan.
Go into the contract creator and start the level as a mechanic. Use the focus mode to target the mechanic working on the suspended car, and then activate the release trigger next to him before making your way towards an exit. If you’ve done things right, you should now have a contract available where your target is an NPC called Milton Geiger. Save the contract, go into the contract browser, and then find and launch your new contract, making sure to start from the garage mechanic role again. If you’re playing on the PlayStation 4, searching for “Milton Geiger” in the contract browser will direct you to a mission I’ve already created, saving you the hassle of doing it yourself.
Once you’re back in the mission, splat poor Geiger with the car then head on over to the very front of the compound where two guards stand watch in front of the red and white striped barriers. Enter the shack on the right of the barriers and grab the quadbike key from the shelf. You’ll then want to hunt around the orchard area for 10 avocados, which shouldn’t be too hard to find as there are plenty of crates dotted around containing them. Lastly, you’ll want to sneak into Ezra Berg’s torture garage and grab the hallucinogenic drugs from the shelf.
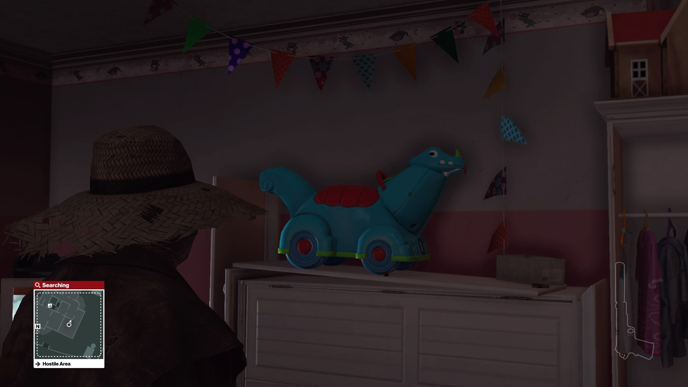
With all the ingredients gathered, head into the house and go upstairs into the children’s bedroom where a guard and a hacker are playing Kane & Lynch 2 on TV. Dispatch these two wayward souls, make sure to hide their bodies, and then approach the large dinosaur bike sitting on the dresser. A prompt will appear that allows you to feed the bike, which you will need to do a total of 10 times before it disappears into a puff of smoke. Exit the house, and head to the escape route next to the mechanic starting point to witness the most whimsical moment of 47’s life.
3. Hokkaido – It was always a lie
Sentient AI will be the death of mankind, of this much we can be sure, but thankfully the technology isn’t quite there yet. The same cannot be said for the GAMA health centre in Hokkaido, which is partially operated by a hyper sophisticated AI called KAI. If you’ve ever played the Portal games, you’ll know there’s only one way this can end.
There are two parts to this cameo crossover, and in order to witness both, you’ll need to acquire two specific outfits; a security guard suit, and the director’s lab coat. Luckily, there’s a trick to getting both fairly easily. Start off inside your own suite as Tobias Reaper, immediately climb out of bed and exit the room. Turn right in the hallway and run to central avenue that leads up into the main level of the hospital. As you ascend the steps, you’ll walk past the director, but we’ll come back for him in a second. At the top of the stairs, turn left and enter the bathroom. Knock the patient unconscious and drag him so that he is in the middle of the room, but that he is aligned with the doorway. The trick here is to wait until the director comes back up the stairs, then to open the door and let him discover the unconscious patient. Once the director enters the bathroom, close the door and knock him out, then drag both bodies into the empty stall and take the director’s coat.
From here, make your way up to the second floor. Enter the observation room on the right, which should only have one guard in it, and knock him out. Swap clothes with the guard, then swap back to the director before dragging the guard’s body into the next room where the KAI servers are. After tucking his body away, go back and grab the guard uniform, then leave the observation chamber, head down the hall and enter the training room where two guards are doing pushups. Challenge the guard to a contest, and after beating him with your genetically superior body, go back and grab the director’s outfit again before entering the KAI server room. Follow the on-screen prompts to shut off the server entirely, but instead of leaving the room, hang around for a little while and listen to the machine slowly transition into the mindset of an all too familiar homicidal AI.
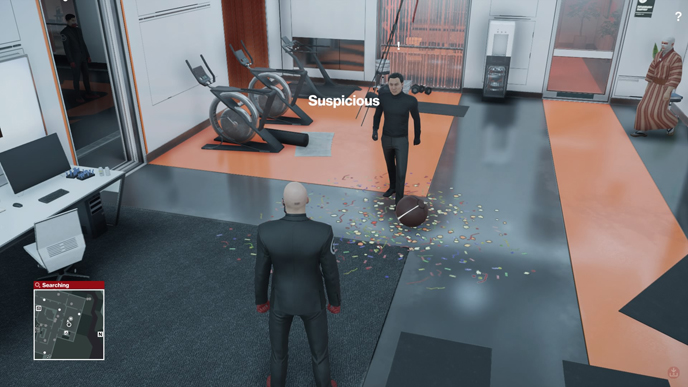
The fun doesn’t stop there either, as another Portal character is waiting just around the corner for you. Go back and grab the guard outfit again, then head on over to the training room where you did your pushups. After a sudden blackout, a familiar spherical face will drop in and pay you a visit. What’s more, if you can somehow roll him all the way outside and down the exit where the motorbike is parked, you’ll get to make his dreams come true. Don’t you just love a happy ending?
2. Hokkaido – Kaiju kidding me
There’s a terrible secret hiding in the valleys of Hokkaido, and only one genetically grafted ninja knows the truth. Armed only with his trusty ninja garbs, and his knowledge of secret pathways, this lone wanderer will bring about the destruction of the Japanese countryside to get revenge on those that betrayed him.
Okay, so maybe it won’t be that dramatic, but this might just be one of the coolest secrets in the game. It’s also one of the most complicated to trigger, which is why you should instead watch YouTuber Handel Williams to explain the specifics of the routine involved in conjuring up this mighty beast. The most important part about activating this secret is that you will need to have unlocked the mountainside path, which requires Hokkaido mastery level 7. Select the mountain pass as your starting point, ignore the katana and head down the pathway, turning left at the bottom and circling around the building. Climb the piping next to the first automatic doors you see on your right, and then follow the instructions above to trigger the event. It took me a few attempts to get the footwork right myself, but if the light disappears for any reason, just head back to the corner where you start from and it should reappear.
1. Hokkaido – Chain reaction
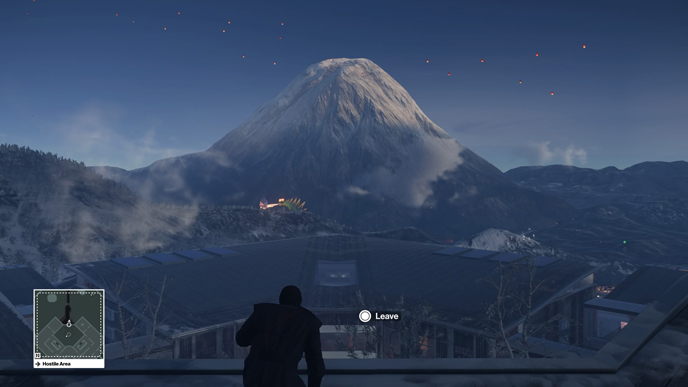
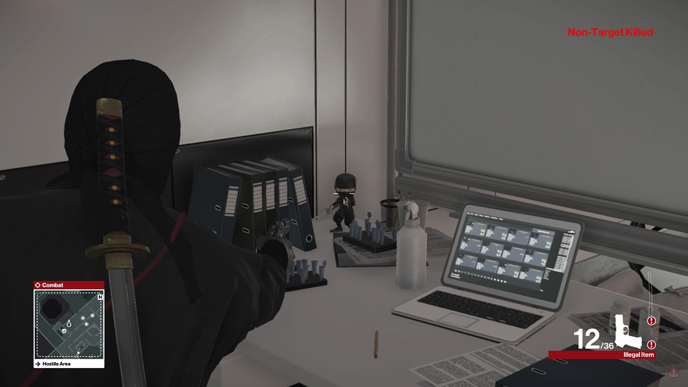
Remember Mini Ninjas? IO Interactive remembers, and rightly so considering they made it eight years ago. Not ones to let sleeping dogs lie, it seems IO couldn’t resist bringing back their micro-mob of ninjas, scattering them to the four corners of the Hokkaido hospital for any loyal fans to seek out and promptly destroy, shattering their hopes of a sequel along with the pieces of the destroyed figures. Those willing to hunt down the stealthy gang can at least look forward to a spectacular light show for their efforts.
There are 10 Mini Ninja figures scattered across the map in total, and each statue has to be destroyed in a specific order to trigger the main event. The statues are incredibly well hidden, so we’ll turn to YouTuber OKIGorgon for a complete rundown of the order and locations of each figurine. You’ll want to make sure you’re packing a silenced pistol for this one, as you’ll be navigating through some heavily populated areas, and triggering an alarm state could cut short your ninja hunt. When the final ninja falls, look to the horizon for a sign that the mountain in the distance has indeed noticed you.
Andy Moore is a gaming freelancer based in the UK. When he’s not writing, he can be found staring blankly out of the nearest window, or spending way too much time on Twitter.
