
Plan the Hell Out of Your Next Trip with Google’s My Maps
Photos courtesy of Google My Maps

There’s something to be said for getting lost when you’re traveling, for going off script and opening yourself up to new, unexpected experiences. But constantly improvising rarely ends well, and you’re likely to miss out on what could have been some of the most memorable moments of your trip, if you’d only done a bit of planning.
The solution: Put in the legwork before you leave home, and give yourself a knowledge base that can help you decide whether to wing it or not. By having a basic understanding of a city’s geography, its most interesting (to you) attractions, and the places you want to eat and drink—plus how to get from point A to point B—you can save yourself loads of time and, most importantly, avoid the possibility of a disappointing experience.
Guidebooks can be cumbersome and are quickly outdated, while apps like Yelp and Tripadvisor leave you dependent on the whims and opinions of random travelers. Instead, take the time to create your own customized city guide using Google’s My Maps feature, which you can access anytime on your phone using Google Maps, and update with the My Maps app. Here’s how to get started:
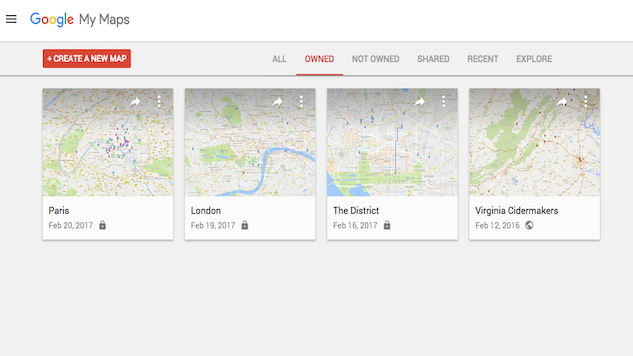
1. Head to Google.com/mymaps and push the red “Create a New Map” button. All of the maps you create will live here unless you delete them.
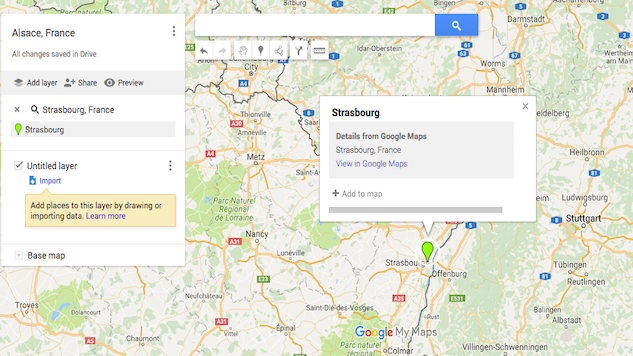
2. Use the search bar to find your location—we’re focusing on Strasbourg, France and the surrounding region—and click “add to map.” This is your hub. Then name your map. We went basic with “Alsace, France” for ours, but you could also get creative with, say, “Amy and Austin’s Awesome Alsace Adventure.” Or something like that.
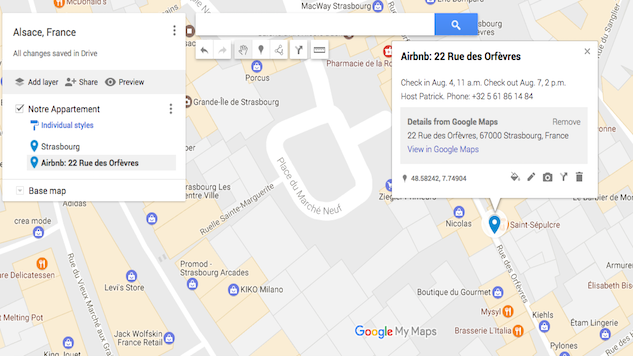
3. It’s time to start populating your map! Begin by adding where you’ll be staying, whether a hotel, hostel, or Airbnb. This will be your first layer, so go ahead and change the name. This is also a good place to store important check-in details like dates, times, and phone numbers—just click the pencil icon to add in those details. If you’re staying in multiple locations in the same area, add them all to this layer.
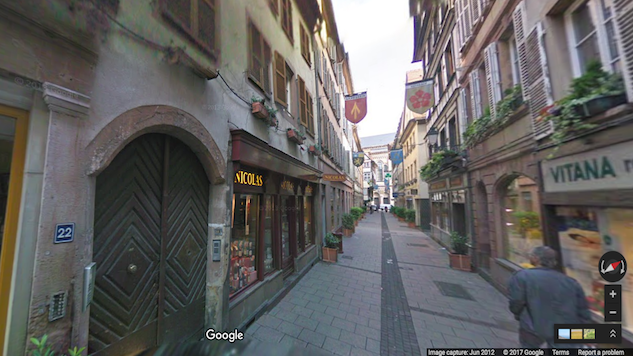
4. While we’re here, go ahead and click “view in Google Maps” and take a quick gander at Street View. This gives you a nice visual on what to expect when you arrive, like what the door looks like, the parking situation, and what’s nearby (a patisserie downstairs!). You can even take a virtual stroll around the block and start gathering ideas for more places to add to your map.
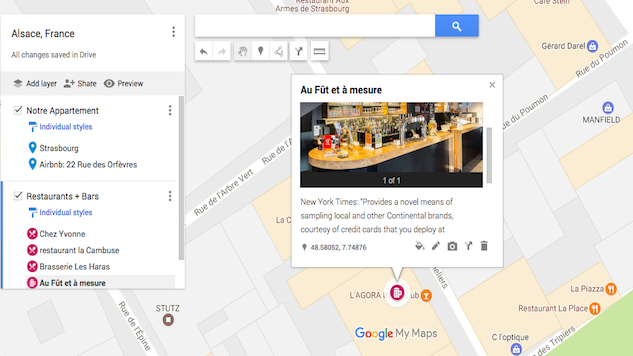
5. Now that we know where we’re staying, let’s move on to the finer details of the trip. Click “add layer” in the left-hand column and name it to reflect its focus—we went with Restaurants + Bars. Now use the search bar to find that restaurant your best friend recommended or the bar Anthony Bourdain tweeted about. Click “add to map,” then click the “edit” button to add a few details to help you remember why you want to go there. You can also add a photo if it helps—just click on the camera icon and plug the name into Google Images to grab one you like. Lastly, click the little paint can button to change the color of your marker—we’re making all of our bars and restaurants fuchsia so they’re easy to recognize at a glance. You can also choose an icon to represent each place; be sure to click “more icons” to browse through hundreds of fun options (like our frothy beer stein).
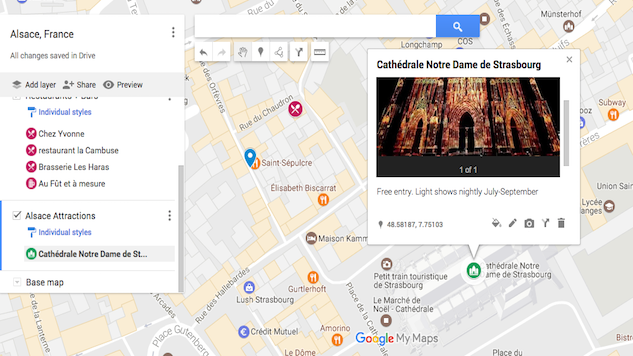
6. Ready for another layer? It’s a good idea to map the attractions you want to hit during your trip, with details about entry fees, special events, and random tips you might run across (like the best time to go to avoid crowds) saved on your map. You could also add layers for shops, museums, parks, day trips, and transportation (like train stations, parking lots, and bike share hubs).
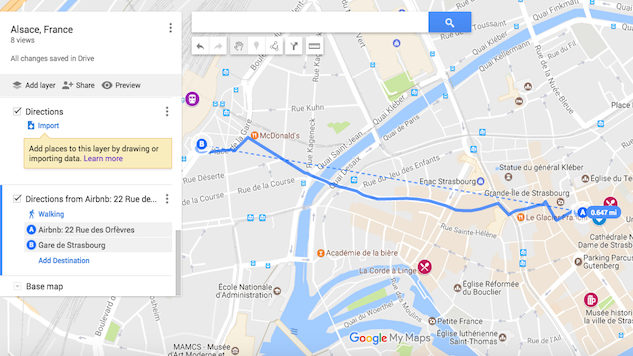
7. We already established that sometimes getting lost can be fun. But if you’ve been traveling all day and you’re exhausted and you’ve got to meet your Airbnb host at a specified time, getting lost could ruin your day. That’s why it’s a good idea to create a layer on your map with important directions, like how to get from the train station to your apartment. That way, you can easily pull up the saved map on your phone to help you get to where you need to go.
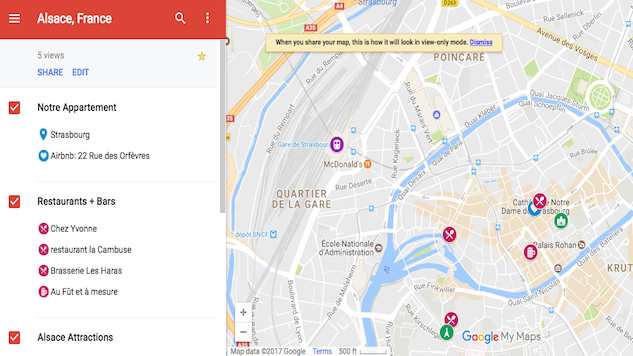
8. Click “Preview” to see what your map looks like. You can select or de-select different layers to focus on different places—say, if you only want to see restaurants when you’re looking for a lunch spot. You can also quickly share your map with traveling companions—or anyone else—via Facebook, Twitter, email, etc. Tweak your settings to allow them to add locations to the map, if you like. Click the little star in the upper left corner to make sure it’s easily accessible in your Google Maps app.
In the weeks leading up to your trip, don’t forget to keep adding to your map as you run across things you’d like to do and see. Once you arrive, simply pull up your map and let it guide you around your destination. You’ll never blindly stumble into a subpar restaurant or over-crowded museum again—unless you want to.
Paste’s Airbnb columnist Erica Jackson Curran is a former alt-weekly editor turned moonlight freelancer based in Richmond, Virginia.